
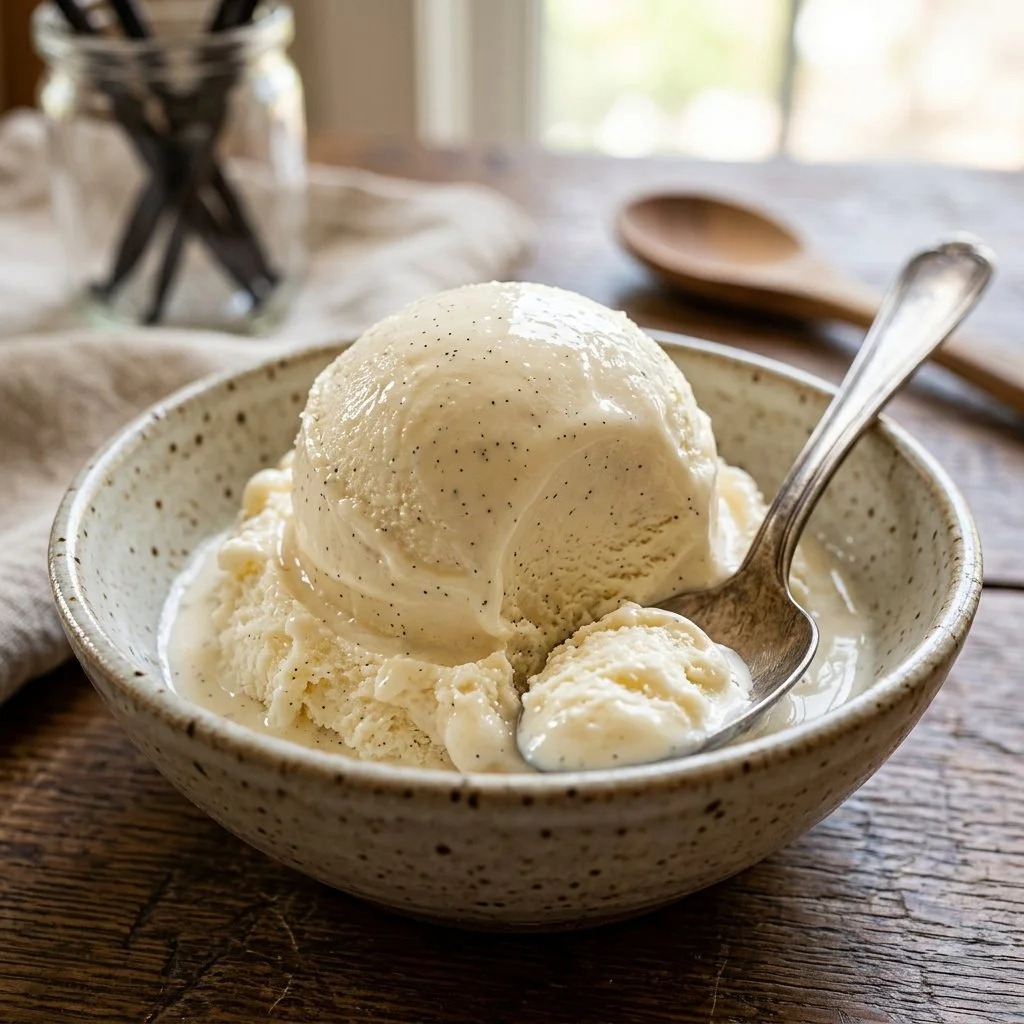
There’s something undeniably magical about homemade ice cream, especially when it’s classic vanilla. For me, it takes me back to sweltering summer days as a child, running barefoot in the grass, the scent of blooming flowers filling the air, and the sound of laughter echoing from neighbor’s backyards. And somewhere in that warm haze of nostalgia, the sweet allure of vanilla ice cream dancing on my taste buds became my ultimate summer treat. Now, every time I whip up a batch of this velvety goodness in my kitchen, those cherished memories come flooding back, and I can’t help but share this delight with family and friends.
Recipe Timing
- Prep Duration: 20 minutes
- Active Cooking: 15 minutes
- Total Duration: 5 hours (includes chilling and freezing)
- Portion Size: Serves about 8
- Complexity: Simple
Nutritional Recipe
- Calories per portion: Approx. 320
- Protein: 5g
- Carbs: 26g
- Fats: 24g
- Fiber: 0g
- Sugars: 20g
- Sodium: 150mg
Why You’ll Love This Homemade Vanilla Ice Cream
Imagine scooping smooth, rich vanilla ice cream from a tub, letting it sit just a moment before it begins to soften slightly. The first bite envelopes your mouth with creaminess, the taste of pure vanilla wrapping around you like a warm embrace. This ice cream isn’t just a dessert; it’s a celebration of simple ingredients, an homage to warmth, and an invitation to gather. Whether enjoyed on its own or as the perfect companion to a slice of warm pie, this homemade version will make you forget all about store-bought ice cream.
The Complete Cooking Journey
Making this homemade vanilla ice cream is not just a recipe; it’s an experience that allows you to participate in the magic of food. Start by preparing your ingredients and cooking patiently, allowing each step to unfold naturally. As you combine the rich cream and sweet vanilla, visualize the lovely moments you’ll share with loved ones over bowls filled with joy.
Ingredients:
- 2 cups heavy cream
- 1 cup whole milk
- 3/4 cup granulated sugar
- 1 tablespoon pure vanilla extract
- 1/2 teaspoon salt
- 5 large egg yolks
Method:
Step 1: Heat the Cream Mixture
In a saucepan, heat the cream, milk, sugar, and salt over medium heat until the sugar dissolves. Stir occasionally and watch the mixture froth gently, filling your kitchen with its inviting aroma.
Step 2: Whisk the Egg Yolks
In a separate bowl, whisk the egg yolks until they are pale and slightly thickened. You want that silky texture to create the perfect custard-like base for your ice cream.
Step 3: Temper the Yolks
Gradually add the heated cream mixture to the yolks while whisking continuously. This step is crucial; it gently warms the yolks without scrambling them, ensuring a smooth, rich base.
Step 4: Thicken the Mixture
Pour the mixture back into the saucepan and cook over low heat, stirring constantly until thickened and it coats the back of a spoon. You’ll notice the custard thickening, a sign that creamy goodness is just around the corner!
Step 5: Stir in Vanilla
Remove the saucepan from heat and stir in the vanilla extract. Take a moment to breathe in the wonderful scent as it blends beautifully with the warm custard.
Step 6: Chill the Mixture
Chill the mixture in the refrigerator for at least 4 hours, or overnight for best results. This waiting period allows the flavors to develop and becomes the smoothest treat.
Step 7: Churn Your Ice Cream
Churn the chilled mixture in an ice cream maker according to the manufacturer’s instructions. This step turns your custard into that luscious texture we crave.
Step 8: Freeze Until Firm
Transfer the churned ice cream into a container and freeze until firm, about 2-4 hours. The waiting is the hardest part, but trust me—it’s well worth it!
Serving Suggestions & Pairings
Serve your homemade vanilla ice cream in chilled bowls topped with fresh berries, a drizzle of chocolate sauce, or even a sprinkle of crushed cookies for texture. Pair it with warm apple pie, brownies, or simply enjoy it solo on a hot summer day.
Storage & Leftovers Guide
Store your homemade ice cream in an airtight container in the freezer. It can last up to two weeks, but I promise it won’t last that long! To make serving easier, use an ice cream scoop dipped in warm water to get perfect scoops right out of the freezer.
Kitchen Wisdom & Success Tips
- Egg Yolk Quality: Always use the freshest eggs you can find for the best flavor and color.
- Patience in Chilling: Allow the mixture to chill completely for the best churning results.
- Beyond Vanilla: Don’t stop here; try adding mix-ins like cookie dough or caramel swirls for a fun twist!
Flavor Variations & Adaptations
Feeling adventurous? Experiment with different flavors by adding fruit purees, nut butters, or even steeping the cream with mint leaves or espresso for a delightful surprise. The possibilities are endless!
Reader Questions & Solutions
-
Why did my ice cream freeze too hard?
- This can happen if there’s not enough air incorporated into the ice cream. Make sure to churn it adequately and allow it to soften for a few minutes before scooping.
-
Can I use low-fat milk instead?
- While you can, it will affect the creaminess. The higher the fat content, the creamier the ice cream.
-
How can I prevent ice crystals?
- Ensure your mixture is well-chilled and churned adequately. Storing it tightly covered will help minimize ice crystals too.
-
Is it safe to consume raw egg yolks?
- If you’re worried about consuming raw eggs, consider using pasteurized eggs or find a custard-based ice cream recipe that cooks the mixture thoroughly.
-
Can I make ice cream without an ice cream maker?
- Yes! Just pour the mixture into a freezer-safe container and stir every 30 minutes for about 2-3 hours, until it reaches your desired texture.
Wrapping Up
Making homemade vanilla ice cream is more than just a recipe; it’s a chance to create sweetness, nostalgia, and joy in your kitchen. With a few simple ingredients and a little love, you can craft a delightful treat that will have everyone asking for seconds. So gather your ingredients, channel that childhood joy, and dive into the delightful world of homemade ice cream. Here’s to creating beautiful memories—one scoop at a time!
PrintHomemade Vanilla Ice Cream
A classic homemade vanilla ice cream that brings nostalgia and joy with every scoop.
- Prep Time: 20 minutes
- Cook Time: 15 minutes
- Total Time: 300 minutes
- Yield: 8 servings 1x
- Category: Dessert
- Method: Churning
- Cuisine: American
- Diet: Vegetarian
Ingredients
- 2 cups heavy cream
- 1 cup whole milk
- 3/4 cup granulated sugar
- 1 tablespoon pure vanilla extract
- 1/2 teaspoon salt
- 5 large egg yolks
Instructions
- Heat the cream, milk, sugar, and salt over medium heat until the sugar dissolves.
- Whisk the egg yolks until pale and slightly thickened in a separate bowl.
- Gradually add the heated cream mixture to the yolks while whisking continuously.
- Pour the mixture back into the saucepan and cook over low heat, stirring constantly until thickened.
- Remove from heat and stir in the vanilla extract.
- Chill the mixture in the refrigerator for at least 4 hours, or overnight.
- Churn the chilled mixture in an ice cream maker according to the manufacturer’s instructions.
- Transfer the churned ice cream into a container and freeze until firm, about 2-4 hours.
Notes
Use the freshest eggs for best flavor. Patience in chilling is key for smooth texture.
Nutrition
- Serving Size: 1 serving
- Calories: 320
- Sugar: 20g
- Sodium: 150mg
- Fat: 24g
- Saturated Fat: 15g
- Unsaturated Fat: 6g
- Trans Fat: 0g
- Carbohydrates: 26g
- Fiber: 0g
- Protein: 5g
- Cholesterol: 240mg