There’s something magical about dessert, isn’t there? It’s more than just a sweet finish to a meal; it’s often a way to connect with people, to celebrate moments big and small. One such moment in my kitchen came when I decided to make a Butterfinger Bomb Cake for my son’s birthday. With sprinkles of excitement filling the air, I wanted not just a cake but an explosion of flavor and fun. As I gathered my ingredients, the aroma of chocolate and peanut butter embraced me, and I knew this was going to be a hit! Let me take you through this delightful journey of baking a cake that is as indulgent as it is easy.
Recipe Timing
- Prep Duration: 20 minutes
- Active Cooking: 30 minutes
- Total Duration: 1 hour
- Portion Size: 10 servings
- Complexity: Simple
Nutritional Recipe
- Calories per portion: Approximately 380
- Protein: 5 grams
- Carbs: 47 grams
- Fats: 20 grams
- Fiber: 1 gram
- Sugars: 30 grams
- Sodium: 280 mg
Why You’ll Love This Butterfinger Bomb Cake
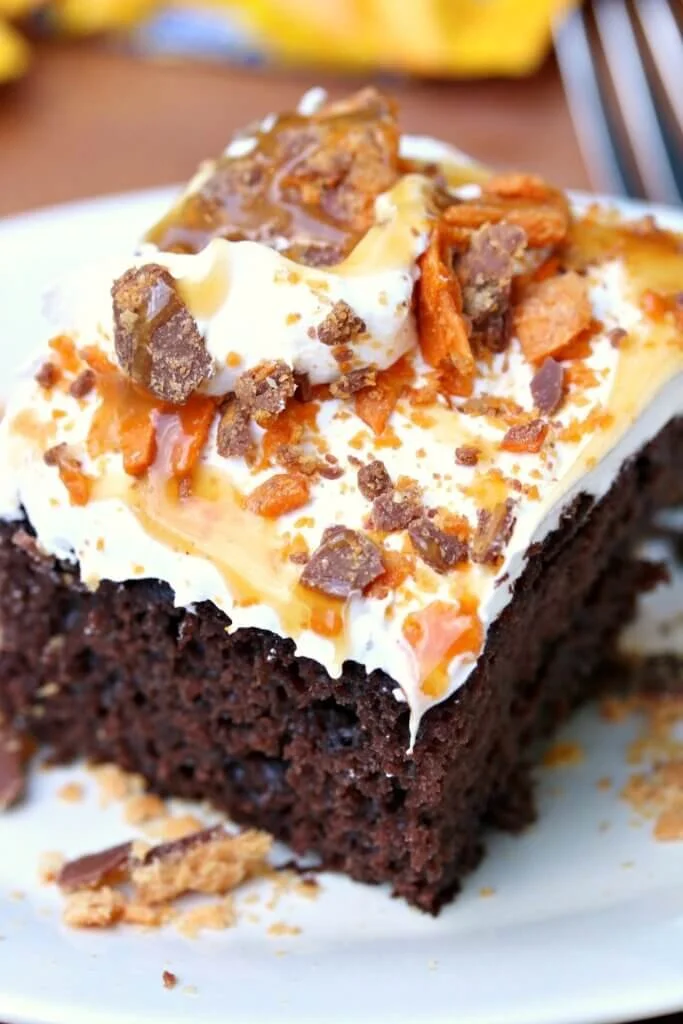
This Butterfinger Bomb Cake is not your everyday chocolate cake. It’s a vibrant dance of layers bringing together moist chocolate cake, a creamy peanut butter filling, and the iconic crunch of Butterfinger bars. The combination of flavors creates utter bliss—each bite is rich, sweet, and satisfying. Whether you’re celebrating a birthday or simply indulging on a cozy weekend, this cake brings joy to any gathering. Plus, it’s straightforward enough for anyone, even kitchen novices!
The Complete Cooking Journey
Let’s walk through the steps to creating this decadent treat together. It might seem like a lot, but trust me, it’s all a part of the fun!
Ingredients:
- 1 box chocolate cake mix
- Ingredients to prepare cake (water, eggs, oil, based on box instructions)
- 1 cup creamy peanut butter
- 1 cup powdered sugar
- 1 cup whipped topping
- 1 cup Butterfinger candy bars, crushed
- Chocolate syrup, for drizzling
Method:
Step 1: Preheat and Prepare
Preheat the oven according to cake mix instructions and prepare two 9-inch round cake pans. This sets the stage for baking the perfect cake!
Step 2: Create the Cake Batter
Prepare the cake batter as directed on the box and divide it evenly between the prepared cake pans. This is where the chocolate magic begins!
Step 3: Bake and Cool
Bake according to package instructions, then allow to cool completely. The delightful aroma during baking will fill your kitchen, tempting everyone nearby!
Step 4: Mix the Peanut Butter Filling
In a bowl, combine the peanut butter and powdered sugar until smooth. Fold in the whipped topping. This creamy mixture is the heart of your cake.
Step 5: Assemble the First Cake Layer
Once the cakes are cool, place one layer on a serving plate and spread the peanut butter mixture over it. Evenly spread it to ensure every bite gets that peanut buttery goodness.
Step 6: Add the Crunch!
Add a layer of crushed Butterfinger bars on top of the peanut butter mixture. This is where the fun texture comes into play!
Step 7: Layer it Up
Place the second cake layer on top and drizzle chocolate syrup over the cake. This step is essential for that luscious chocolate finish.
Step 8: Garnish for Style
Garnish with additional crushed Butterfinger bars if desired. It not only looks fantastic but also adds extra crunch!
Step 9: Serve and Enjoy
Slice and serve! Each piece reveals the beautiful layers, tantalizing your guests’ taste buds.
Serving Suggestions & Pairings
This cake pairs beautifully with a scoop of vanilla ice cream or a dollop of fresh whipped cream. For an extra touch, serve it with a glass of cold milk or a rich cup of coffee. It’s perfect for birthday celebrations, family gatherings, or even a cozy soirée with friends!
Storage & Leftovers Guide
Leftover slices can be stored in an airtight container at room temperature for up to 3 days. If you need to keep it longer, refrigerate for up to a week. Just make sure to separate layers with parchment paper to inhibit sticking!
Kitchen Wisdom & Success Tips
- Ensure all ingredients, especially eggs and butter, are at room temperature for a smoother batter.
- If you want to save time, you can substitute homemade whipped topping with store-bought for convenience.
- Make sure to let the cakes cool completely before assembling; this prevents the filling from melting and maintains the structure.
Flavor Variations & Adaptations
Feel free to experiment with different cake flavors—vanilla, red velvet, or even a funfetti mix could work beautifully! For a healthier take, swap out the chocolate cake mix for a lower-calorie brand and use natural sweeteners.
Reader Questions & Solutions
Q1: My cake didn’t rise. What went wrong?
A: Ensure your baking powder is fresh and that you’ve adhered to the instructions on the cake mix box for measurements.
Q2: How do I stop my cakes from sticking to the pan?
A: Grease the pans well with butter or a non-stick spray and consider using parchment paper as a liner.
Q3: Can I use crunchy peanut butter instead?
A: Absolutely! Crunchy peanut butter will add an extra layer of texture that pairs beautifully with the Butterfinger.
Q4: What if I can’t find Butterfinger bars?
A: You can substitute with any chocolate-covered peanut butter candy or even crushed toffee bars for similar flavor and crunch.
Q5: How can I make the cake more chocolatey?
A: Adding miniature chocolate chips to the cake batter can enhance the choco-factor!
Wrapping Up
This Butterfinger Bomb Cake is more than just a cake; it’s an experience—an explosion of flavors that will bring smiles to everyone at your table. Whether for a special occasion or just because, I hope you try this recipe and enjoy the process just as much as the delightful result. Get ready to indulge in a slice of happiness, and remember, the only thing better than making this cake is sharing it with loved ones. Happy baking!
PrintButterfinger Bomb Cake

A decadent chocolate cake layered with creamy peanut butter filling and crunchy Butterfinger bars, perfect for celebrations.
- Prep Time: 20 minutes
- Cook Time: 30 minutes
- Total Time: 50 minutes
- Yield: 10 servings 1x
- Category: Dessert
- Method: Baking
- Cuisine: American
- Diet: Vegetarian
Ingredients
- 1 box chocolate cake mix
- Ingredients to prepare cake (water, eggs, oil, based on box instructions)
- 1 cup creamy peanut butter
- 1 cup powdered sugar
- 1 cup whipped topping
- 1 cup Butterfinger candy bars, crushed
- Chocolate syrup, for drizzling
Instructions
- Preheat the oven according to cake mix instructions and prepare two 9-inch round cake pans.
- Prepare the cake batter as directed on the box and divide it evenly between the prepared cake pans.
- Bake according to package instructions, then allow to cool completely.
- In a bowl, combine the peanut butter and powdered sugar until smooth, then fold in the whipped topping.
- Once the cakes are cool, place one layer on a serving plate and spread the peanut butter mixture over it.
- Add a layer of crushed Butterfinger bars on top of the peanut butter mixture.
- Place the second cake layer on top and drizzle chocolate syrup over the cake.
- Garnish with additional crushed Butterfinger bars if desired.
- Slice and serve!
Notes
Store leftover slices in an airtight container at room temperature for up to 3 days or refrigerate for up to a week. Use parchment paper between layers to prevent sticking.
Nutrition
- Serving Size: 1 serving
- Calories: 380
- Sugar: 30g
- Sodium: 280mg
- Fat: 20g
- Saturated Fat: 8g
- Unsaturated Fat: 12g
- Trans Fat: 0g
- Carbohydrates: 47g
- Fiber: 1g
- Protein: 5g
- Cholesterol: 40mg