
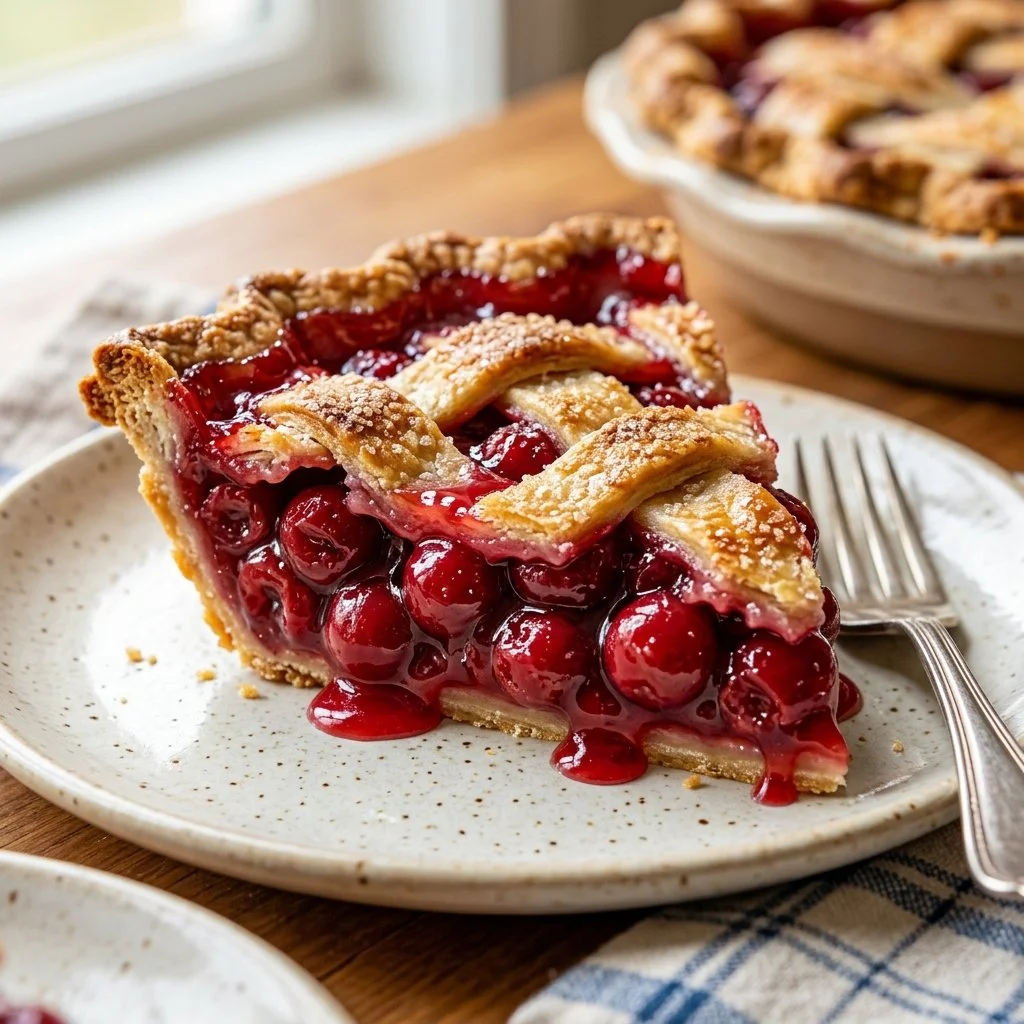
As the summer sun begins to dip below the horizon, I often find myself wandering into the kitchen, nostalgia wrapped tightly around my heart. Some of my fondest memories bloom from the simple act of pie making with my grandmother. The warm scent of fresh cherries mingled with just the right amount of sugar and that unmistakable crunch of a perfectly browned crust evoke images of lazy summer afternoons, laughter, and the delight of shared desserts. There’s something undeniably comforting about cherry pie; it’s more than a dessert; it’s a tradition that speaks to the heart.
With cherry season gracing the markets, I knew it was time to whip up a Homemade Cherry Pie that would take me back to those cherished days. This pie isn’t just a recipe; it’s an invitation to gather with loved ones, share a slice, and create new memories. Let’s dive into this delightful journey of making your own cherry pie!
Recipe Timing
- Prep Duration: 20 minutes
- Active Cooking: 50 minutes
- Total Duration: 1 hour 10 minutes
- Portion Size: 8 slices
- Complexity: Simple
Nutritional Recipe
- Calories per portion: 300
- Protein: 2g
- Carbs: 44g
- Fats: 12g
- Fiber: 2g
- Sugars: 20g
- Sodium: 280mg
Why You’ll Love This Homemade Cherry Pie
Imagine a golden, flaky crust hugging a filling so luscious that the moment you take a bite, your taste buds dance with joy. The vibrant tartness of cherries balanced by the sweetness of sugar and a whisper of vanilla and almond creates a flavor explosion that feels like summer on your plate. It’s a timeless dessert that beckons you to savor every crumb, making it perfect for gatherings or a quiet evening spent reminiscing.
The Complete Cooking Journey
Let’s embark on this delightful journey together, transforming simple ingredients into a beautiful pie that tells a story. With every step, from the mixing of the filling to the baking of the crust, you’ll see how these humble components come together to create something extraordinary.
Ingredients:
- 2 cups fresh or frozen cherries, pitted
- 1 cup sugar
- 2 tablespoons cornstarch
- 1 tablespoon lemon juice
- 1 teaspoon vanilla extract
- 1/4 teaspoon almond extract
- 1 tablespoon butter
- 1 package pie crusts (or homemade crust)
- 1 egg (for egg wash)
- 1 tablespoon sugar (for topping)
Method:
Step 1: Preheat the Oven
Preheat your oven to 425°F (220°C).
Step 2: Prepare the Cherry Filling
In a large bowl, combine the cherries, sugar, cornstarch, lemon juice, vanilla, and almond extract. Mix gently but thoroughly to ensure the cherries are coated evenly.
Step 3: Roll Out the First Pie Crust
Roll out one pie crust and fit it into a pie pan, making sure the edges hang over slightly for crimping later.
Step 4: Add the Cherry Filling
Pour the cherry filling into the prepared crust and dot with butter for that extra richness and flavor.
Step 5: Roll Out the Second Pie Crust
Roll out the second crust, place it over the filling, and seal the edges by pinching them together. You can flute the edges or simply press with a fork for a rustic look.
Step 6: Create Steam Vents
Cut slits in the top crust to allow steam to escape—a perfect opportunity for artistic design!
Step 7: Brush and Sprinkle
Brush the crust with beaten egg for that beautiful golden finish, and sprinkle sugar on top to add sweetness and a bit of crunch.
Step 8: Bake to Perfection
Bake in the preheated oven for 15 minutes. Then, reduce the temperature to 350°F (175°C) and bake for an additional 30-35 minutes until the crust is golden and the filling is bubbly.
Step 9: Cool and Serve
Allow the pie to cool before serving to let those flavors mingle and the filling set for easier slicing.
Serving Suggestions & Pairings
Serve your pie warm with a scoop of vanilla ice cream or a dollop of freshly whipped cream. For an extra touch of luxury, pair it with a glimmering glass of sparkling white wine or a chilled lemonade.
Storage & Leftovers Guide
To store leftover pie, cover it loosely with foil or plastic wrap and keep it in the refrigerator for up to 3 days. For longer-lasting enjoyment, freeze individual slices wrapped in plastic wrap and foil, which can last for up to 3 months. Simply reheat in the oven before serving.
Kitchen Wisdom & Success Tips
- Use a mix of sweet and tart cherries for a more balanced flavor.
- If using frozen cherries, let them thaw completely and drain any excess liquid to prevent a watery filling.
- A very cold crust will yield a flakier pie; consider chilling your dough for 30 minutes before rolling it out.
Flavor Variations & Adaptations
Feel free to get creative! Add a teaspoon of cinnamon or nutmeg to the filling for warmth, or swap out some of the cherries for blueberries or raspberries. You can even experiment with different crusts—try a crumb topping for a streusel effect.
Reader Questions & Solutions
-
My pie crust always shrinks during baking; what can I do?
- Make sure your pie crust is well-chilled before baking. If you find it shrinks, try letting it relax after rolling it out before fitting it into the pan.
-
How do I know when my pie is finished baking?
- The pie is done when the crust is golden brown and the filling is bubbling through the slits in the top crust.
-
Can I use canned cherries instead of fresh or frozen?
- Absolutely! Just ensure to drain them well before mixing with other ingredients, and you may want to reduce the sugar as canned fruit can be sweetened.
-
What can I do if my filling is too runny?
- If the filling turns out runny, mix in a little extra cornstarch in the future with your fruit, or let the pie cool longer before serving to allow it to set.
-
Is there a way to make a gluten-free cherry pie?
- Yes! Substitute traditional pie crust with a gluten-free flour blend or store-bought gluten-free pie dough.
Wrapping Up
Nothing quite compares to the joyful experience of baking a pie from scratch. This Homemade Cherry Pie encapsulates the sweet moments of life, celebrating the present while honoring cherished memories. So, gather your loved ones, roll up your sleeves, and let this recipe inspire heartwarming moments around your dinner table. Happy baking, and may your slice of pie be as delightful as the stories it creates!
PrintHomemade Cherry Pie
A simple and nostalgic cherry pie recipe that brings together tart cherries and a flaky crust, perfect for summer gatherings.
- Prep Time: 20 minutes
- Cook Time: 50 minutes
- Total Time: 70 minutes
- Yield: 8 slices 1x
- Category: Dessert
- Method: Baking
- Cuisine: American
- Diet: Vegetarian
Ingredients
- 2 cups fresh or frozen cherries, pitted
- 1 cup sugar
- 2 tablespoons cornstarch
- 1 tablespoon lemon juice
- 1 teaspoon vanilla extract
- 1/4 teaspoon almond extract
- 1 tablespoon butter
- 1 package pie crusts (or homemade crust)
- 1 egg (for egg wash)
- 1 tablespoon sugar (for topping)
Instructions
- Preheat your oven to 425°F (220°C).
- In a large bowl, combine the cherries, sugar, cornstarch, lemon juice, vanilla, and almond extract. Mix gently but thoroughly to ensure the cherries are coated evenly.
- Roll out one pie crust and fit it into a pie pan, making sure the edges hang over slightly for crimping later.
- Pour the cherry filling into the prepared crust and dot with butter for that extra richness and flavor.
- Roll out the second crust, place it over the filling, and seal the edges by pinching them together. You can flute the edges or simply press with a fork for a rustic look.
- Cut slits in the top crust to allow steam to escape—a perfect opportunity for artistic design!
- Brush the crust with beaten egg for that beautiful golden finish, and sprinkle sugar on top to add sweetness and a bit of crunch.
- Bake in the preheated oven for 15 minutes. Then, reduce the temperature to 350°F (175°C) and bake for an additional 30-35 minutes until the crust is golden and the filling is bubbly.
- Allow the pie to cool before serving to let those flavors mingle and the filling set for easier slicing.
Notes
Use a mix of sweet and tart cherries for a more balanced flavor. If using frozen cherries, let them thaw completely and drain any excess liquid to prevent a watery filling.
Nutrition
- Serving Size: 1 slice
- Calories: 300
- Sugar: 20g
- Sodium: 280mg
- Fat: 12g
- Saturated Fat: 6g
- Unsaturated Fat: 6g
- Trans Fat: 0g
- Carbohydrates: 44g
- Fiber: 2g
- Protein: 2g
- Cholesterol: 30mg