The moment I unwrapped the cheerful crinkly foil from the cherry pie filling, childhood memories flooded back. I could almost hear the giggles of my sister and me, racing each other to the dessert table at family gatherings, eagerly claiming the slices dressed in rich chocolate and bursting with cherries. It’s fascinating how food has this remarkable power to transport us, isn’t it? That’s the magic I want to share with you today through my No Bake Black Forest Cheesecake recipe. Not only is it a nod to the beloved classic dessert, but it also brings together the indulgent flavors of chocolate, cream cheese, and tart cherries without ever needing to turn on the oven. Let’s dive into this sweet adventure together!
Recipe Timing
- Prep Duration: 20 minutes
- Active Cooking: 15 minutes
- Total Duration: 4 hours and 15 minutes (including chilling)
- Portion Size: Serves 10
- Complexity: Simple
Nutritional Recipe
- Calories per portion: 400 kcal
- Protein: 4 g
- Carbs: 25 g
- Fats: 34 g
- Fiber: 1 g
- Sugars: 20 g
- Sodium: 150 mg
Why You’ll Love This No Bake Black Forest Cheesecake
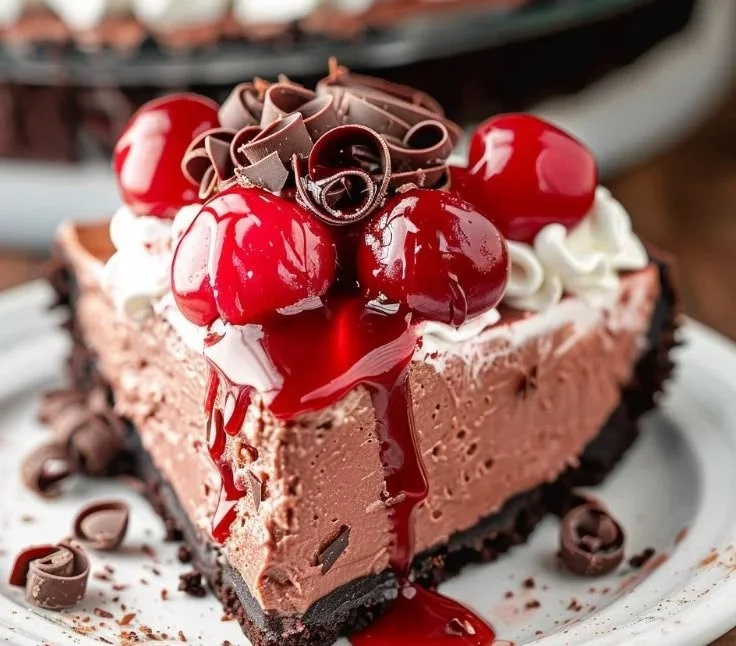
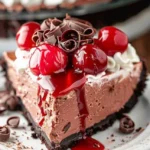
Imagine slicing into a luxurious cheesecake, only to discover layers of rich cream cheese enveloped in a velvety smooth chocolate embrace and topped with sweet cherries. This delightful No Bake Black Forest Cheesecake is perfect for celebrations or just a sweet treat after dinner. It’s incredibly easy — no baking necessary! This means you’ll have more time to enjoy with family or friends, and the unique combination of flavors will have them asking for seconds.
The Complete Cooking Journey
Creating this cheesecake is more than just following a recipe — it’s a beautiful journey of combining textures and flavors that will make your heart flutter. You’ll start with a crunchy Oreo crust, followed by a light and airy cream cheese filling, and finish with luscious cherry pie filling and a drizzle of chocolate that makes every bite irresistible.
Ingredients:
- 2 cups Oreo crumbs
- 1/2 cup unsalted butter, melted
- 2 cups cream cheese, softened
- 1 cup powdered sugar
- 1 teaspoon vanilla extract
- 2 cups heavy cream
- 1 cup cherry pie filling
- 1/2 cup chocolate chips, melted
- Cherries for garnish
Method:
Step 1: Prepare the Oreo Crust
In a bowl, combine Oreo crumbs and melted butter, mixing until well combined. Press the mixture into the bottom of a springform pan to form the crust.
Step 2: Create the Cream Cheese Mixture
In a separate bowl, beat together the cream cheese, powdered sugar, and vanilla extract until smooth.
Step 3: Whip the Heavy Cream
In another bowl, whip the heavy cream until stiff peaks form. Fold the whipped cream into the cream cheese mixture until well combined.
Step 4: Layer the Cheesecake
Spread half of the cream cheese mixture over the crust, add a layer of cherry pie filling, then the remaining cream cheese mixture.
Step 5: Drizzle with Chocolate
Drizzle the melted chocolate over the top of the cheesecake.
Step 6: Chill for Perfection
Chill in the refrigerator for at least 4 hours or until set.
Step 7: Final Touches and Serving
Once set, top with additional cherry pie filling and garnish with cherries before serving.
Serving Suggestions & Pairings
This No Bake Black Forest Cheesecake is beautiful as is, but it shines brightly when paired with a cup of fresh coffee or a scoop of ice cream for an extra indulgence. For a festive touch, serve it at a gathering alongside homemade whipped cream or a fresh fruit salad.
Storage & Leftovers Guide
You can store leftover cheesecake slices in an airtight container in the fridge for up to 3 days. However, be warned — they might not last that long! This cheesecake can also be frozen for up to a month; just ensure it’s well-wrapped to prevent freezer burn. To thaw, simply place it in the fridge overnight before serving.
Kitchen Wisdom & Success Tips
- If you want a thicker crust, use 2 ½ cups of Oreo crumbs instead of 2 cups.
- Let the cream cheese soften at room temperature for easier mixing.
- Use a spatula to gently fold in the whipped cream, allowing for a light and fluffy texture.
- Ensure the cheesecake is chilled long enough to set properly; it will be worth the wait!
Flavor Variations & Adaptations
Feeling adventurous? You can swap the Oreo crust for a graham cracker crust if you prefer something different. Alternatively, introduce more flavors by incorporating crushed nuts or coconut into the crust or experiment with different fruit toppings like raspberries or mixed berries for a twist.
Reader Questions & Solutions
-
Can I use light cream cheese?
- Yes, light cream cheese can be used, but it may result in a slightly softer cheesecake.
-
What can I substitute for heavy cream?
- You can use half-and-half or whipped topping if you want a lighter version, but the texture will be different.
-
How do I know when the cheesecake is set?
- The cheesecake should be firm to the touch and not jiggly. It may take longer based on fridge temperature.
-
Can I make this ahead of time?
- Absolutely! This cheesecake is perfect for making a day in advance, allowing the flavors to meld.
-
What if I don’t like cherries?
- Feel free to top the cheesecake with fresh strawberries, blueberries, or a chocolate ganache instead!
Wrapping Up
So there you have it! A dreamy, No Bake Black Forest Cheesecake that not only tickles your taste buds but also invokes memorable moments shared with loved ones. I hope you’ll take this recipe and make it your own. Whether it’s a special occasion or just because you deserve a treat, this cheesecake is sure to delight. As you slice into it, may it bring as much joy to your kitchen as it has to mine! Happy baking, or rather, chilling!
PrintNo Bake Black Forest Cheesecake
A delightful No Bake Black Forest Cheesecake that combines the rich flavors of chocolate, cream cheese, and tart cherries, perfect for any celebration.
- Prep Time: 20 minutes
- Cook Time: 15 minutes
- Total Time: 255 minutes
- Yield: 10 servings 1x
- Category: Dessert
- Method: No-bake
- Cuisine: American
- Diet: Vegetarian
Ingredients
- 2 cups Oreo crumbs
- 1/2 cup unsalted butter, melted
- 2 cups cream cheese, softened
- 1 cup powdered sugar
- 1 teaspoon vanilla extract
- 2 cups heavy cream
- 1 cup cherry pie filling
- 1/2 cup chocolate chips, melted
- Cherries for garnish
Instructions
- Prepare the Oreo Crust: In a bowl, combine Oreo crumbs and melted butter, mixing until well combined. Press the mixture into the bottom of a springform pan to form the crust.
- Create the Cream Cheese Mixture: In a separate bowl, beat together the cream cheese, powdered sugar, and vanilla extract until smooth.
- Whip the Heavy Cream: In another bowl, whip the heavy cream until stiff peaks form. Fold the whipped cream into the cream cheese mixture until well combined.
- Layer the Cheesecake: Spread half of the cream cheese mixture over the crust, add a layer of cherry pie filling, then the remaining cream cheese mixture.
- Drizzle with Chocolate: Drizzle the melted chocolate over the top of the cheesecake.
- Chill for Perfection: Chill in the refrigerator for at least 240 minutes or until set.
- Final Touches and Serving: Once set, top with additional cherry pie filling and garnish with cherries before serving.
Notes
This cheesecake pairs beautifully with fresh coffee or ice cream. It can be stored in the fridge for up to 3 days or frozen for a month.
Nutrition
- Serving Size: 1 slice
- Calories: 400
- Sugar: 20g
- Sodium: 150mg
- Fat: 34g
- Saturated Fat: 21g
- Unsaturated Fat: 13g
- Trans Fat: 0g
- Carbohydrates: 25g
- Fiber: 1g
- Protein: 4g
- Cholesterol: 70mg