
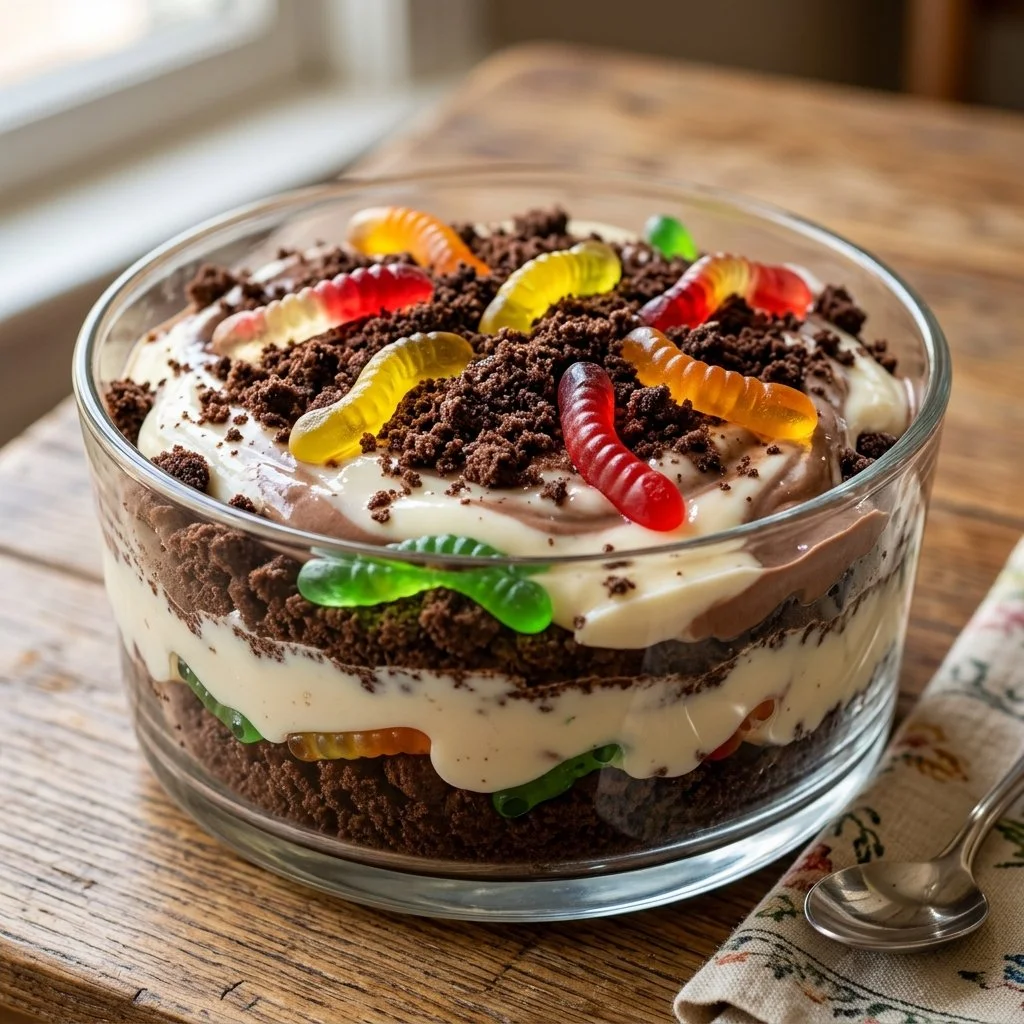
As a child, my weekends were filled with the sweet aroma of chocolate wafting through the house, thanks to my mom’s irresistible Dirt Pudding. This whimsical dessert, with its layers of creamy chocolate and crunchy Oreos, quickly became a favorite not just for me but for all the kids in the neighborhood. There was something magical about scooping from a bowl filled with what looked like dirt, only to uncover the rich chocolaty goodness hidden beneath.
Now, as an adult, I continue this tradition, crafting this delightful dessert for family gatherings and celebrations. It never fails to excite younger guests, and even adults can’t help but indulge in its nostalgic flavor. So, let’s dig into the delightful layers of Dirt Pudding together!
Recipe Timing
- Prep Duration: 15 minutes
- Active Cooking: 5 minutes
- Total Duration: 2 hours 15 minutes (including chilling time)
- Portion Size: Serves 8
- Complexity: Simple
Nutritional Recipe
- Calories per portion: Approximately 250
- Protein: 3g per serving
- Carbs: 35g per serving
- Fats: 12g per serving
- Fiber: 1g per serving
- Sugars: 20g per serving
- Sodium: 250mg per serving
Why You’ll Love This Dirt Pudding
Dirt Pudding is a playful dessert that combines a rich chocolate flavor with the delightful crunch of Oreos. With no baking required, this layered treat is incredibly simple to make and perfect for both adults and children. What’s more, its charming presentation adorned with gummy worms is sure to be a showstopper at any gathering. Each spoonful is a trip down memory lane, evoking childhood joy while satisfying your sweet tooth!
The Complete Cooking Journey
Embarking on the adventure of making Dirt Pudding is as delightful as the final product! Gathering your ingredients and layering them to create a beautiful dish is an experience everyone should share. Plus, it’s a great dessert for any occasion—birthday parties, barbecues, or simply a sweet treat after dinner.
Ingredients:
- 1 package of chocolate pudding mix
- 2 cups milk
- 1 package of Oreos, crushed
- 1 tub of whipped topping (e.g., Cool Whip)
- Gummy worms (optional for decoration)
Method:
Step 1: Prepare the Chocolate Pudding
In a mixing bowl, prepare the chocolate pudding according to the package instructions using milk. The delightful aroma will start to fill your kitchen!
Step 2: Fold in the Whipped Topping
Once the pudding has thickened, fold in the whipped topping until the mixture is well combined. This step is crucial for creating that luscious, creamy texture.
Step 3: Layer the Crushed Oreos
In a large serving dish, layer half of the crushed Oreos at the bottom. This will provide a fantastic crunch that complements the creaminess of the pudding.
Step 4: Add the First Layer of Pudding
Pour half of the pudding mixture over the crushed Oreos. Smooth it out gently to create an even layer.
Step 5: Repeat the Oreo Layer
Add another layer of the remaining crushed Oreos on top of the pudding. This extra layer brings more texture and flavor.
Step 6: Add the Final Pudding Layer
Pour the rest of the pudding on top, smoothing it out to ensure an even surface. Your Dirt Pudding is really starting to take shape!
Step 7: Garnish with Oreos and Worms
Top with any remaining crushed Oreos and decorate with gummy worms if desired. This playful touch is what makes it a fun treat for kids and adults alike.
Step 8: Chill Before Serving
Chill in the refrigerator for at least 2 hours before serving. This resting time allows flavors to meld and the dessert to firm up nicely.
Serving Suggestions & Pairings
Dirt Pudding can be served alone or paired with other fun dessert items like fruit salads or chocolate chip cookies. It works beautifully for themed parties or Halloween events—imagine it as a centerpiece on a spooky dessert table!
Storage & Leftovers Guide
Dirt Pudding can be stored in the refrigerator for up to 3 days. Just make sure to cover it well to keep it fresh and delicious. If you’re expecting leftovers, you may want to reserve some gummy worms for decorating right before serving.
Kitchen Wisdom & Success Tips
- Quality Ingredients: Choose high-quality chocolate pudding mix for the best flavor.
- Texture Matters: Aim for a creamy pudding by mixing thoroughly when folding in the whipped topping.
- Chocolate Alternatives: If Oreos aren’t your thing, consider using chocolate chip cookies for a tasty variation.
- Serving Bowl: A clear glass bowl works wonders for showcasing the layers!
- Make it Ahead: This dessert can be made a day in advance, making it perfect for busy occasions.
Flavor Variations & Adaptations
Feel free to experiment! You can add layers of sliced bananas, strawberries, or even crushed peanut butter cookies for a different flavor profile. For a more adults-only version, consider using a splash of coffee liqueur in the pudding mix.
Reader Questions & Solutions
-
Q: Can I make this dairy-free?
A: Yes! Use almond milk or coconut milk and vegan whipped topping to create a dairy-free version. -
Q: What if I don’t have Oreos?
A: Any chocolate cookie will work! Try using Trader Joe’s Joe-Joe’s or any other chocolate sandwich cookies. -
Q: How long does it take for the pudding to set?
A: Typically, it will take about 2 hours in the refrigerator to fully set. -
Q: Can I freeze Dirt Pudding?
A: It’s best stored in the fridge, but if you do freeze it, keep in mind that the texture may change after thawing. -
Q: How can I make it more chocolatey?
A: Add chocolate chips to the pudding mix or incorporate a chocolate glaze layer for an extra rich dessert!
Wrapping Up
Creating Dirt Pudding is not just about making a dessert; it’s about indulging in a childhood favorite that brings joy to everyone around the table. The layers of flavors, combined with the playful presentation, make it an unforgettable treat. So roll up your sleeves, dive into the world of Dirt Pudding, and enjoy the smiles it brings to your loved ones! Happy cooking!