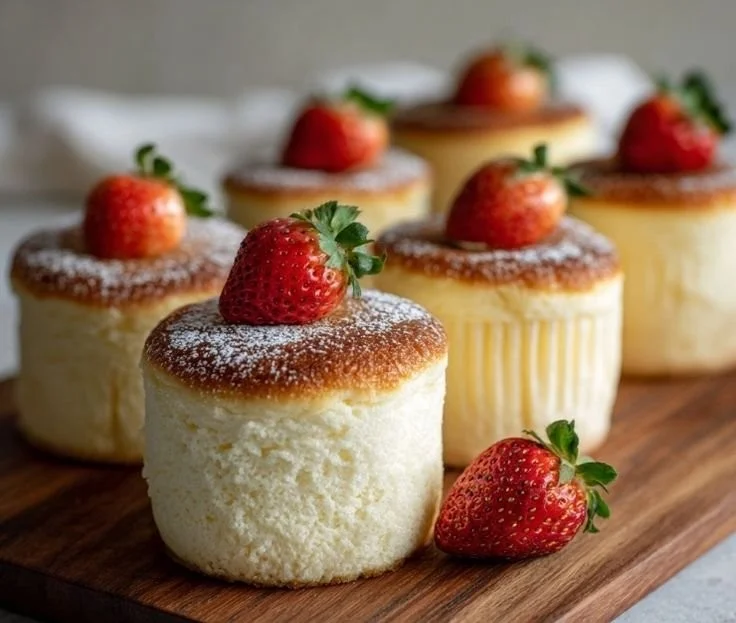
Fluffy, delicate, and downright dreamy—if you’ve never experienced the joy of Japanese cotton cheesecake cupcakes, you’re in for a treat. I still remember the first time I encountered these fluffy wonders at a quaint little café during my travels through Japan. Each bite was like sinking into a cloud, soft yet substantial, with just the right amount of sweetness to dance on my taste buds. Inspired, I knew I had to recreate this little piece of heaven in my own kitchen.
Let’s dive into this delightful journey as we learn how to whip up Fluffy Japanese Cotton Cheesecake Cupcakes that will transport you straight to that charming café.
Recipe Timing
- Prep Duration: 15 minutes
- Active Cooking: 30 minutes
- Total Duration: 45 minutes
- Portion Size: 6 cupcakes
- Complexity: Simple
Nutritional Recipe
- Calories per portion: 180
- Protein: 4g per serving
- Carbs: 22g per serving
- Fats: 10g per serving
- Fiber: 0g per serving
- Sugars: 7g per serving
- Sodium: 130mg per serving
Why You’ll Love This Fluffy Japanese Cotton Cheesecake Cupcakes
Imagine a cupcake that feels like a feather—light, airy, and melts in your mouth with each bite. These Fluffy Japanese Cotton Cheesecake Cupcakes are not just desserts; they are an experience! The combination of cream cheese with a hint of vanilla creates a comforting flavor, while the whipped egg whites bring in that magical fluffiness. Perfect for afternoon tea or as a sweet ending to a meal, these cupcakes are bound to impress friends and family. Plus, they’re delightfully simple to make—don’t worry, I’ll walk you through every step!
The Complete Cooking Journey
Our cupcake journey starts with a humble block of cream cheese and evolves into a light-as-air dessert that defies belief. Gather your ingredients, and let’s get started!
Ingredients:
- 8 oz cream cheese, softened
- 1/4 cup granulated sugar
- 4 tbsp milk
- 3 large eggs, separated
- 1 tsp vanilla extract
- 1/2 cup all-purpose flour
- 1 tsp cornstarch
- 1/8 tsp salt
- 1/4 cup powdered sugar (for dusting)
Method:
Step 1: Preheat the Oven & Prepare Muffin Tin
Preheat the oven to 320°F (160°C). Line a muffin tin with cupcake liners or parchment paper to ensure easy removal later.
Step 2: Cream the Cheese
In a mixing bowl, beat the softened cream cheese with granulated sugar until smooth. This creates a luscious base for our cupcakes.
Step 3: Mix in Milk, Egg Yolks, and Vanilla
Add the milk, egg yolks, and vanilla extract to the cream cheese mixture, mixing well to combine. This will add creaminess and flavor to our cupcakes.
Step 4: Sift and Combine Dry Ingredients
Sift in the all-purpose flour and cornstarch, mixing until there are no lumps. This way, you’ll get that wonderful light texture.
Step 5: Whip the Egg Whites
In a separate bowl, beat the egg whites and salt until soft peaks form. Gradually add the granulated sugar (for the egg whites) while continuing to beat until stiff peaks form. This step is crucial for achieving the fluffiness we desire.
Step 6: Fold Gently
Gently fold the whipped egg whites into the cream cheese mixture in three additions, being careful not to deflate the mixture. This patience and care will pay off in texture.
Step 7: Fill the Cupcake Liners
Divide the batter evenly among the cupcake liners, filling them about 2/3 full.
Step 8: Bake
Bake in the preheated oven for 30 minutes, or until the tops are lightly golden and the centers are set. Your kitchen will soon be filled with a sweet, inviting aroma.
Step 9: Cool Completely
Remove from the oven and let cool completely in the tin.
Step 10: Dust and Serve
Once cooled, dust the tops with powdered sugar and serve. Enjoy the experience of biting into a soft, airy cupcake that feels like a hug from a fluffy cloud!
Serving Suggestions & Pairings
These cupcakes shine on their own but can be paired beautifully with a dollop of whipped cream, fresh berries, or even a drizzle of chocolate sauce. Their elegance makes them perfect for gatherings, teas, or as a sweet surprise after dinner.
Storage & Leftovers Guide
These cupcakes are best enjoyed fresh but can be stored in an airtight container in the refrigerator for up to 3 days. Allow them to return to room temperature before serving again for the best taste and texture.
Kitchen Wisdom & Success Tips
- Be sure to beat the egg whites thoroughly; stiff peaks are key to that wonderful fluffiness.
- Be gentle when folding in the egg whites; this maintains the airy texture.
- Experiment with different flavorings, like almond extract or lemon zest, to customize your cupcakes.
Flavor Variations & Adaptations
Feeling adventurous? Try adding a teaspoon of matcha powder for a green tea twist or a bit of cocoa powder for a chocolate version. You can also swap the vanilla extract for orange or lemon zest for a citrusy freshness.
Reader Questions & Solutions
-
Why did my cupcakes sink after baking?
- Sinking can happen if the egg whites weren’t whipped to stiff peaks or if the mixture was over-mixed when folding. Ensure you gently incorporate the whipped egg whites.
-
Can I use low-fat cream cheese?
- Yes, but keep in mind it may affect the overall texture and fluffiness of the cupcakes. Full-fat cream cheese yields the best results.
-
How do I know when they are done baking?
- Look for a light golden color on top and a slight jiggle in the center. The centers should be set but still tender to the touch.
-
Is there a gluten-free version of this recipe?
- Absolutely! Substitute the all-purpose flour with a gluten-free blend.
-
Can I make these cupcakes ahead of time?
- Yes, you can make them ahead! Just follow the storing instructions and allow them to come to room temperature before serving.
Wrapping Up
Creating these Fluffy Japanese Cotton Cheesecake Cupcakes is a delightful culinary adventure that rewards you with light-as-a-feather treats. Whether you’re sharing them with loved ones or savoring them solo, each bite is a reminder to embrace the joy of home cooking. Give this recipe a try, and soon you’ll be transporting your taste buds to Japan, one fluffy muffin at a time! Enjoy your baking journey!
PrintFluffy Japanese Cotton Cheesecake Cupcakes

Light, airy cupcakes inspired by the delightful Japanese cotton cheesecake experience.
- Prep Time: 15 minutes
- Cook Time: 30 minutes
- Total Time: 45 minutes
- Yield: 6 cupcakes 1x
- Category: Dessert
- Method: Baking
- Cuisine: Japanese
- Diet: Vegetarian
Ingredients
- 8 oz cream cheese, softened
- 1/4 cup granulated sugar
- 4 tbsp milk
- 3 large eggs, separated
- 1 tsp vanilla extract
- 1/2 cup all-purpose flour
- 1 tsp cornstarch
- 1/8 tsp salt
- 1/4 cup powdered sugar (for dusting)
Instructions
- Preheat the oven to 320°F (160°C). Line a muffin tin with cupcake liners.
- Cream the cream cheese with granulated sugar until smooth.
- Add milk, egg yolks, and vanilla extract, mixing well.
- Sift in all-purpose flour and cornstarch until there are no lumps.
- Whip egg whites and salt until soft peaks form. Gradually add sugar while continuing to beat until stiff peaks form.
- Fold the whipped egg whites into the cream cheese mixture in three additions.
- Divide the batter evenly among the cupcake liners, filling them about 2/3 full.
- Bake for 30 minutes until the tops are lightly golden.
- Cool completely in the tin.
- Dust with powdered sugar and serve.
Notes
These cupcakes are best enjoyed fresh but can be stored in an airtight container in the refrigerator for up to 3 days.
Nutrition
- Serving Size: 1 cupcake
- Calories: 180
- Sugar: 7g
- Sodium: 130mg
- Fat: 10g
- Saturated Fat: 5g
- Unsaturated Fat: 3g
- Trans Fat: 0g
- Carbohydrates: 22g
- Fiber: 0g
- Protein: 4g
- Cholesterol: 150mg