It’s that magical moment when you catch a whiff of chocolate wafting through your kitchen, and your heart leaps with joy. There’s something truly special about homemade chocolate syrup. It’s a nostalgic blend of warmth, sweetness, and comfort that brings back memories of drizzling it over ice cream or mixing it into a warm glass of milk on a chilly evening. Let me take you on a little journey into why making your own chocolate syrup is not just about the finished product but about the joy of simple, delicious creations that bring us closer to the little pleasures in life.
Recipe Timing
- Prep Duration: 2 minutes
- Active Cooking: 3 minutes
- Total Duration: 5 minutes
- Portion Size: Makes about 1 cup
- Complexity: Simple
Nutritional Recipe
- Calories per portion: Approx. 100 calories
- Protein: 0.5 grams
- Carbs: 26 grams
- Fats: 0.2 grams
- Fiber: 0.5 grams
- Sugars: 24 grams
- Sodium: 2 mg
Why You’ll Love This Homemade Chocolate Syrup (5-Minute Recipe!)
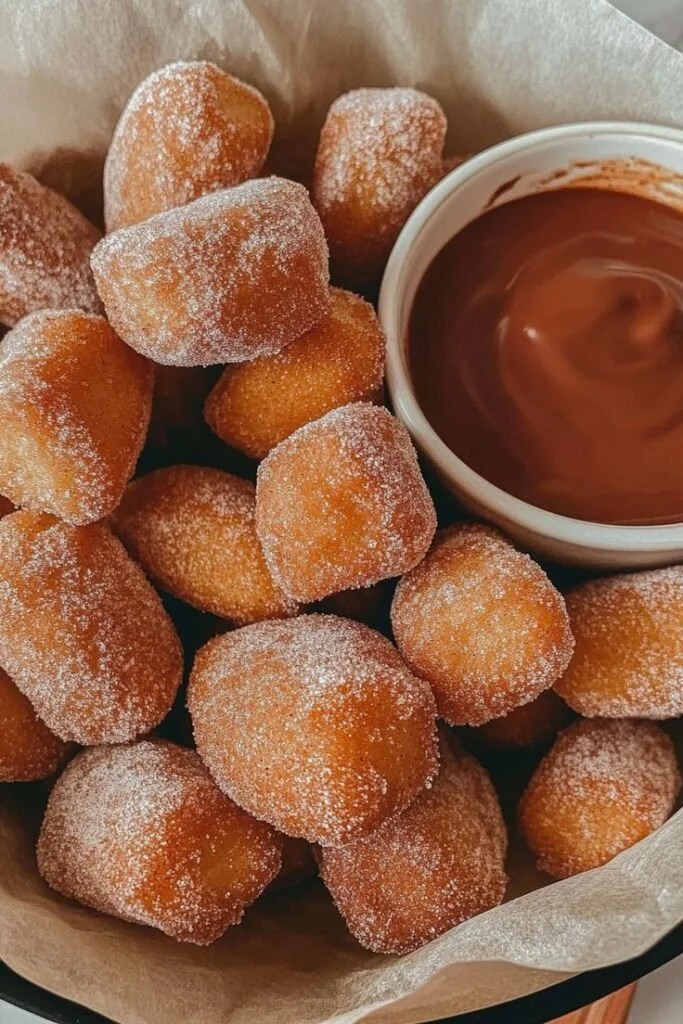
There’s a certain joy in crafting your own chocolate syrup. You get to customize the sweetness, the cocoa richness, and it only takes five minutes! This syrup is perfect for drizzling over pancakes, dipping your favorite fruits, or simply adding a dollop to your favorite desserts. Plus, there’s no need for preservatives or strange ingredients—just pure chocolate goodness that you can feel good about sharing with your family and friends.
The Complete Cooking Journey
In just a few quick steps, you can transform simple pantry ingredients into a luscious syrup that takes your culinary creations to the next level. Let’s dive into how you can whip this up in a flash!
Ingredients:
- 1 cup granulated sugar
- 1/2 cup unsweetened cocoa powder (Use a good quality brand for best flavor.)
- 1 cup water
- 1 teaspoon vanilla extract
- 1/8 teaspoon salt (Just a pinch!)
Method:
Step 1: Combine the Dry Ingredients
In a small saucepan, whisk together the granulated sugar, cocoa powder, and salt until well combined. This step is crucial for a lump-free syrup.
Step 2: Incorporate the Water
Slowly pour in the water while whisking continuously until the mixture is completely smooth.
Step 3: Bring to a Gentle Boil
Place the saucepan over medium heat and bring to a gentle boil, stirring often.
Step 4: Simmer to Thicken
Once boiling, reduce heat to low and simmer for 1-2 minutes, stirring, as it thickens slightly.
Step 5: Add the Vanilla
Remove from heat and stir in the vanilla extract.
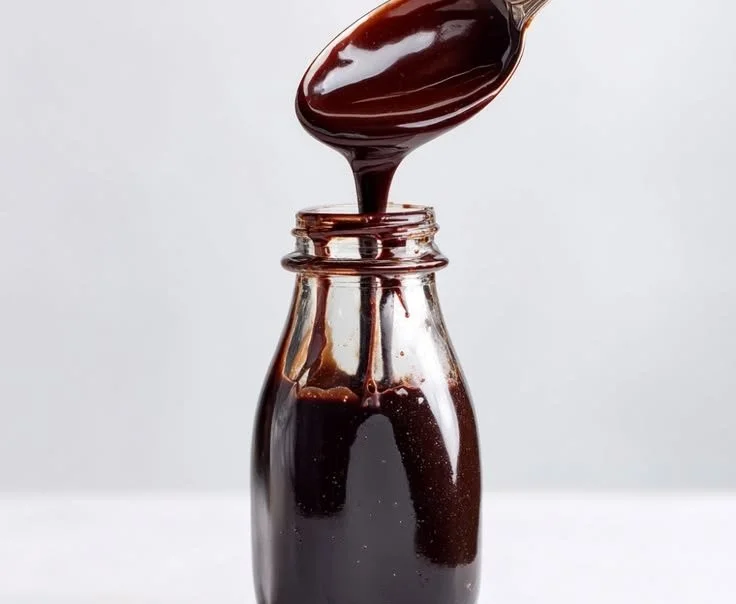
Step 6: Cool Down and Store
Allow the syrup to cool completely. It will thicken significantly as it cools. Transfer to an airtight container and store in the refrigerator for up to 3 weeks.
Serving Suggestions & Pairings
This delightful syrup is incredibly versatile! Drizzle it over vanilla ice cream to elevate that classic sundae, mix it into your morning coffee for a delicious mocha, or use it to elevate pancakes at breakfast. You can even swirl it into your yogurt or oatmeal for a sweet twist! Pair it with fresh strawberries, bananas, or in a chocolate milkshake for added richness.
Storage & Leftovers Guide
Store your homemade syrup in an airtight container in the refrigerator, where it will last for up to three weeks. If it thickens too much in the fridge, just warm it slightly in the microwave or on the stove to bring it back to that perfect drizzle consistency.
Kitchen Wisdom & Success Tips
- Make sure to use high-quality cocoa powder, as this is a key flavor component.
- For a richer taste, consider adding a bit of espresso powder.
- Stirring often while cooking helps prevent scorching and ensures the syrup thickens evenly.
Flavor Variations & Adaptations
Feel free to experiment with flavors! Add a splash of almond extract for a nutty twist or use dark chocolate cocoa powder for a more intense chocolate flavor. You can even infuse your syrup with cinnamon for a hint of spice or chili powder for a spicy kick.
Reader Questions & Solutions
-
Can I use brown sugar instead of granulated sugar?
Yes, brown sugar will give a deeper, molasses-like flavor, making it a delicious alternative! -
Is unsweetened cocoa powder necessary?
Yes, unsweetened cocoa powder is ideal because it allows you to control the sweetness of the syrup. -
How can I make this syrup sugar-free?
You can substitute the granulated sugar with a sugar-free sweetener appropriate for syrups, adjusting the quantity based on the sweetener’s sweetness. -
What if my syrup is too thick?
Simply add a little water and reheat it on low, stirring until it reaches the desired consistency. -
Can I freeze this chocolate syrup?
Freezing isn’t the best option for syrups as it may change the texture. It’s best enjoyed fresh and stored in the fridge.
Wrapping Up
Homemade chocolate syrup is a quick and delightful addition to your pantry. It’s more than just a recipe; it’s a chance to relish the process of creating something heart-warming and simple. So why not give it a try? Each time you dip into that bottle of syrup, you’ll remember the fun you had making it—and that is the sweetest ingredient of all!
PrintHomemade Chocolate Syrup
A quick and delightful recipe for homemade chocolate syrup that enhances your favorite desserts.
- Prep Time: 2 minutes
- Cook Time: 3 minutes
- Total Time: 5 minutes
- Yield: 1 cup 1x
- Category: Sauce
- Method: Stovetop
- Cuisine: American
- Diet: Vegetarian
Ingredients
- 1 cup granulated sugar
- 1/2 cup unsweetened cocoa powder
- 1 cup water
- 1 teaspoon vanilla extract
- 1/8 teaspoon salt
Instructions
- Combine the dry ingredients: In a small saucepan, whisk together the granulated sugar, cocoa powder, and salt until well combined.
- Incorporate the water: Slowly pour in the water while whisking continuously until the mixture is completely smooth.
- Bring to a gentle boil: Place the saucepan over medium heat and bring to a gentle boil, stirring often.
- Simmer to thicken: Once boiling, reduce heat to low and simmer for 1-2 minutes, stirring, as it thickens slightly.
- Add the vanilla: Remove from heat and stir in the vanilla extract.
- Cool down and store: Allow the syrup to cool completely, then transfer to an airtight container and store in the refrigerator for up to 3 weeks.
Notes
Store your syrup in an airtight container in the refrigerator for up to three weeks.
Nutrition
- Serving Size: 1 tablespoon
- Calories: 100
- Sugar: 24g
- Sodium: 2mg
- Fat: 0.2g
- Saturated Fat: 0g
- Unsaturated Fat: 0g
- Trans Fat: 0g
- Carbohydrates: 26g
- Fiber: 0.5g
- Protein: 0.5g
- Cholesterol: 0mg