There’s something incredibly special about mini desserts, isn’t there? They promise indulgence without the guilt looming over you like a raincloud. I vividly remember the first time I crafted these Healthy Protein Cheesecake Jars; I had opted to host a small gathering with friends who were just as passionate about healthy eating as I was. It was a delightful scramble through my pantry, piecing together ingredients like a puzzle, and the result was nothing short of magical. Each spoonful was a gentle reminder that healthy desserts can be deliciously satisfying. And believe me, when you make these jars, they will disappear just as quickly as they came together!
Recipe Timing
- Prep Duration: 20 minutes
- Active Cooking: 10 minutes
- Total Duration: 4 hours 30 minutes (includes chilling time)
- Portion Size: Serves 4
- Complexity: Simple
Nutritional Recipe
- Calories per portion: Approximately 180
- Protein: 14g per serving
- Carbs: 20g per serving
- Fats: 8g per serving
- Fiber: 2g per serving
- Sugars: 3g per serving
- Sodium: 250mg per serving
Why You’ll Love This Healthy Protein Cheesecake Jars: Easy Guilt-Free Dessert
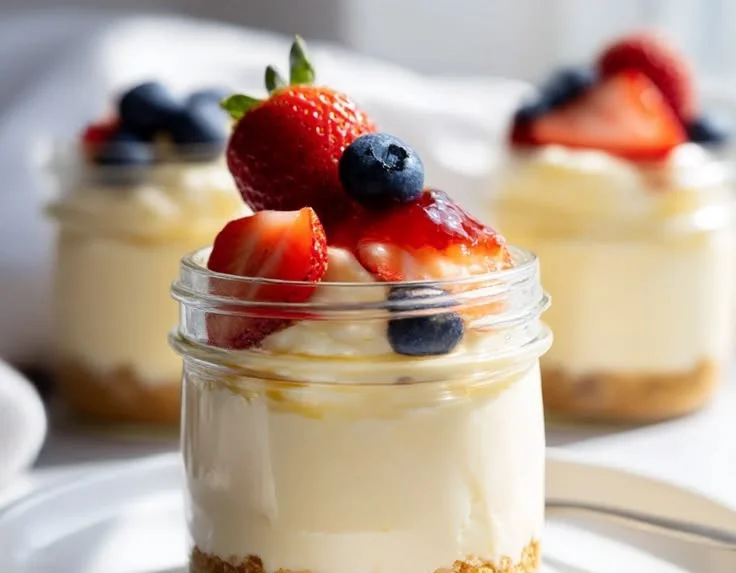
These Healthy Protein Cheesecake Jars epitomize the perfect balance of indulgence and health—a guilt-free dessert that feels a bit like a treat while nourishing your body. Each jar is brimming with creamy, dreamy cheesecake filling that’s rich in protein and has a hint of lemon zing to brighten your taste buds. Top them off with fresh berries, and you have a vibrant, delightful finish that’s as pleasing to the eye as it is on the palate. It’s a dessert you can enjoy without any of the guilt that often accompanies traditional cheesecake!
The Complete Cooking Journey
Let’s embark on this delicious journey together! We’ll begin by prepping our jars and making a light, crunchy base using graham crackers. Next, we’ll whip up a creamy cheesecake filling that is both dreamy and protein-packed. After assembling our layers in beautifully simple mason jars, we’ll let them chill and solidify, creating a luscious dessert perfect for any occasion. Finally, we’ll top them with a burst of freshness from berries and an optional drizzle of nut butter or sugar-free chocolate shavings for a little extra sweetness. Gather your ingredients, and let’s get started!
Ingredients:
- Light Cream Cheese or Neufchâtel
- Greek Yogurt
- Protein Powder (vanilla-flavored whey or casein)
- Sweetener of Choice (erythritol, stevia, monk fruit, or a blend)
- Vanilla Extract
- Lemon Juice
- Crushed Graham Crackers or Digestive Biscuits
- Melted Coconut Oil or Light Butter
- Fresh berries (strawberries, blueberries, raspberries)
- Sugar-free fruit compote
- Nut butter
- Sugar-free chocolate shavings
Method:
Step 1: Prepare Your Jars
Gather your jars, typically 8-ounce mason jars. Ensure they are clean and dry. This step sets the foundation for your beautiful dessert and gives you a flawless canvas to work on!
Step 2: Make the Crust
In a medium bowl, combine crushed graham crackers (or a healthy alternative) with your chosen sweetener and the melted coconut oil or light butter. Mix until it resembles wet sand. This rich crust is going to be the delectable base of your cheesecake, adding that perfect crunch!
Step 3: Assemble the Crust Layer
Spoon 1-2 tablespoons of the crust mixture into the bottom of each jar and press down to create an even layer. Refrigerate while preparing the filling to allow the crust to firm up slightly.
Step 4: Prepare the Cheesecake Filling
In a large mixing bowl, add softened light cream cheese, Greek yogurt, sweetener, vanilla extract, and lemon juice. Beat until smooth and creamy. This filling is what dreams are made of—so luscious and dreamy!
Step 5: Incorporate the Protein Powder
Gradually add the protein powder to the cream cheese mixture, beating on low speed until fully combined. If needed, adjust the consistency with a splash of milk to ensure it’s silky smooth.
Step 6: Fill the Jars
Spoon or pipe the cheesecake filling into the jars over the crusts, filling about three-quarters full. It’s okay to leave a little room for toppings—trust me, you’re going to want to layer on those goodies!
Step 7: Chill to Perfection
Cover the jars and refrigerate for at least 4 hours, preferably overnight. This chilling is crucial! It allows the flavors to meld beautifully and the filling to set just right.
Step 8: Add Your Toppings
Before serving, add fresh berries or your favorite toppings. A handful of colorful berries can transform your jars into a stunning visual feast, along with a sprinkle of sugar-free chocolate shavings or a drizzle of nut butter for that extra flair!
Serving Suggestions & Pairings
These delightful jars are so versatile! They can stand alone as a dessert or be paired beautifully with a warm cup of coffee or a refreshing herbal tea. For a more festive flair, serve them alongside a cheese platter for a delightful contrast of flavors.
Storage & Leftovers Guide
These jars can be stored in the fridge for up to 5 days. Make sure they are covered properly so they maintain their freshness. They make for a perfect grab-and-go snack if you make them in advance!
Kitchen Wisdom & Success Tips
- Rev up the flavor: Don’t shy away from adding a hint more lemon juice if you crave that zesty kick.
- Texture matters: Ensure your cream cheese is softened; this will help the filling to be creamy and smooth.
- Mix and match: Use different fruits as toppings based on your preference or seasonality—this keeps things interesting!
Flavor Variations & Adaptations
Feeling adventurous? Switch up the crust by using crushed nuts for a nutty twist or swap the vanilla protein powder for chocolate for a decadent chocolate cheesecake experience. If you prefer lower-carb options, try almond flour instead of graham crackers!
Reader Questions & Solutions
-
What can I do if my filling is too thick?
Don’t worry! Just add a little bit of milk or Greek yogurt to thin it out until you reach your desired consistency. -
Can I use any sweetener?
Absolutely! Just remember that different sweeteners have varying levels of sweetness, so adjust according to your taste. -
What if I don’t have mason jars?
You can use any small glass or even dessert cups. The key is to allow the cheesecake to set nicely. -
How do I know when the filling is ready?
The filling should be smooth, creamy, and hold its shape when piped into the jars. -
Can I freeze these jars?
Yes, you can freeze them! Just make sure to leave some space at the top of the jar for expansion, and thaw them in the fridge overnight when you want to enjoy them.
Wrapping Up
Indulge your guilt-free desires with these Healthy Protein Cheesecake Jars! They elegantly combine the joy of dessert with nutritious ingredients, allowing you to satisfy your sweet tooth without straying from your healthy eating goals. Whether for a gathering or just a quiet evening treat, these jars will bring a smile to your face and warmth to your heart. Enjoy creating, sharing, and, most importantly, savoring every bite you take!
PrintHealthy Protein Cheesecake Jars
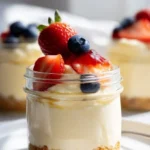
Guilt-free mini desserts that combine indulgence with health, featuring creamy cheesecake filling rich in protein and topped with fresh berries.
- Prep Time: 20 minutes
- Cook Time: 10 minutes
- Total Time: 270 minutes
- Yield: 4 servings 1x
- Category: Dessert
- Method: Refrigerating
- Cuisine: American
- Diet: Healthy, High Protein
Ingredients
- 8 oz Light Cream Cheese or Neufchâtel
- 1 cup Greek Yogurt
- 1 scoop Protein Powder (vanilla-flavored whey or casein)
- Sweetener of Choice (erythritol, stevia, monk fruit, or a blend)
- 1 tsp Vanilla Extract
- 2 tbsp Lemon Juice
- 1 cup Crushed Graham Crackers or Digestive Biscuits
- 2 tbsp Melted Coconut Oil or Light Butter
- Fresh berries (strawberries, blueberries, raspberries)
- 2 tbsp Sugar-free fruit compote
- Nut butter
- Sugar-free chocolate shavings
Instructions
- Prepare Your Jars – Gather your jars, typically 8-ounce mason jars, ensuring they are clean and dry.
- Make the Crust – Combine crushed graham crackers with sweetener and melted coconut oil or light butter until it resembles wet sand.
- Assemble the Crust Layer – Spoon 1-2 tablespoons of the crust mixture into each jar and press down to create an even layer. Refrigerate.
- Prepare the Cheesecake Filling – In a large bowl, beat together cream cheese, Greek yogurt, sweetener, vanilla, and lemon juice until smooth.
- Incorporate the Protein Powder – Gradually add the protein powder to the mixture, beating on low until fully combined, adjusting with milk if needed.
- Fill the Jars – Spoon or pipe the cheesecake filling into the jars, filling about three-quarters full.
- Chill to Perfection – Cover and refrigerate for at least 4 hours, preferably overnight.
- Add Your Toppings – Before serving, top with fresh berries and optional nut butter or sugar-free chocolate shavings.
Notes
These jars can be stored in the fridge for up to 5 days. They make for a perfect grab-and-go snack if made in advance. Adjust the sweetness to your preference.
Nutrition
- Serving Size: 1 jar
- Calories: 180
- Sugar: 3g
- Sodium: 250mg
- Fat: 8g
- Saturated Fat: 4g
- Unsaturated Fat: 3g
- Trans Fat: 0g
- Carbohydrates: 20g
- Fiber: 2g
- Protein: 14g
- Cholesterol: 30mg