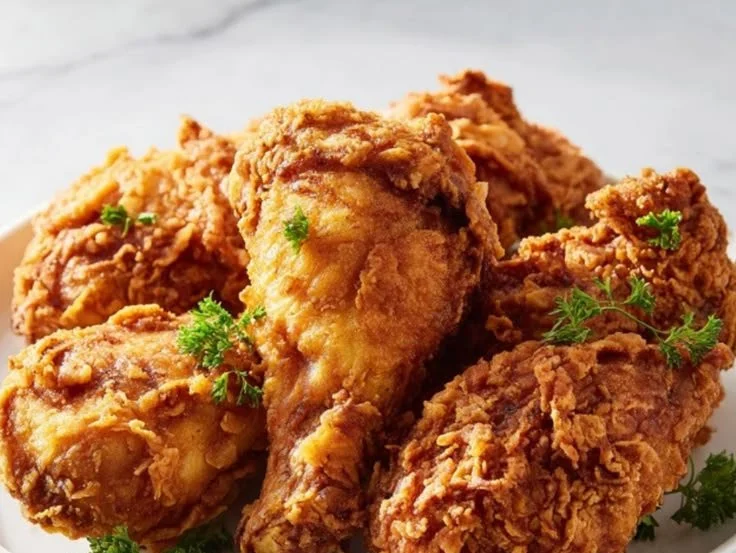
There’s something magical about the aroma of fried chicken wafting through the house. It transports me back to family gatherings, where laughter mingles with the sounds of sizzling chicken in the kitchen. My grandmother had a way of making fried chicken that was nothing short of legendary. Each piece was juicy, tender, and coated in a perfectly crisp shell that had us all sneaking back for seconds—especially those crispy, crunchy bits that fell to the bottom of the plate.
Fried chicken isn’t just food; it’s an experience, an embrace of warmth and comfort that brings people together. Today, I want to share a recipe that pays homage to those cherished moments while bringing my own twist to the table. Grab your favorite apron, because we’re about to dive into the world of crispy fried chicken that you won’t forget!
Recipe Timing
- Prep Duration: 4 hours (minimum, can be overnight)
- Active Cooking: 30 minutes
- Total Duration: 4 hours 30 minutes (plus soaking time)
- Portion Size: Serves 4-6
- Complexity: Simple
Nutritional Recipe
- Calories per portion: Approximately 400
- Protein: 30 grams
- Carbs: 30 grams
- Fats: 20 grams
- Fiber: 1 gram
- Sugars: 1 gram
- Sodium: 800 mg
Why You’ll Love This Crispy Fried Chicken
This crispy fried chicken recipe will quickly become a treasured favorite in your household. The combination of a buttermilk marinade and a crunchy double coating creates an unforgettable texture that provides a satisfying crunch with every bite. Plus, it’s totally customizable; you can tweak the seasonings to match your flavor preferences. Whether you’re having a cozy night in or hosting a gathering, this dish is sure to impress.
The Complete Cooking Journey
Cooking this crispy fried chicken is an adventure of flavors and textures. The journey begins with a long soak in a buttermilk bath—this is your secret weapon for tender, juicy meat. Then comes the exciting part: the coating! With a special blend of spices and the double-dipping technique, you’ll achieve that golden-brown crust that everyone craves. Finally, the frying delivers that beautiful crunch and ensures each piece is juicy on the inside. Pack your patience, because the results are well worth the wait!
Ingredients:
- 3 pounds chicken pieces (drumsticks, thighs, breasts)
- 2 cups buttermilk
- 2 cups all-purpose flour
- 1 cup cornstarch
- 2 tablespoons paprika
- 2 teaspoons garlic powder
- 2 teaspoons onion powder
- 1 teaspoon cayenne pepper
- 2 teaspoons black pepper
- 1 tablespoon salt
- 2 large eggs
- Vegetable oil for frying
Method:
Step 1: Soak the Chicken
Place chicken pieces in a large bowl or zip-top bag. Pour buttermilk over the chicken, ensuring all pieces are completely submerged. Cover and refrigerate for at least 4 hours or overnight for best results. This buttermilk bath tenderizes the meat and adds incredible flavor.
Step 2: Prepare the Coating Mixture
In a large shallow dish, combine flour, cornstarch, paprika, garlic powder, onion powder, cayenne pepper, black pepper, and salt. Mix thoroughly with a whisk or fork until all spices are evenly distributed.
Step 3: Make the Egg Wash
In a separate bowl, beat the eggs with 2 tablespoons of water to create an egg wash.
Step 4: Dredge the Chicken
Remove chicken from buttermilk, allowing excess to drip off. Dredge each piece in the seasoned flour mixture, coating completely.
Step 5: Egg Wash Time
Dip the coated chicken into the egg wash, then return to the flour mixture for a second coating, pressing firmly to ensure maximum coverage.
Step 6: Rest the Coated Chicken
Place coated chicken on a wire rack and let rest for 15 minutes before frying. This helps the coating adhere better.
Step 7: Heat the Oil
Fill a large, heavy-bottomed pot or deep fryer with vegetable oil to a depth of about 3 inches. Heat oil to 350°F (175°C), using a thermometer to monitor temperature accurately.
Step 8: Fry the Chicken
Carefully place 3-4 chicken pieces into the hot oil, being careful not to overcrowd. Fry for 12-15 minutes, turning occasionally, until the coating is deep golden brown and the internal temperature reaches 165°F (74°C). Dark meat may take slightly longer than white meat.
Step 9: Drain the Chicken
Remove cooked chicken and drain on a wire rack or paper towels. Allow oil temperature to return to 350°F between batches.
Step 10: Allow to Rest
Let fried chicken rest on the wire rack for 5 minutes before serving to allow the coating to set and maintain maximum crispiness.
Serving Suggestions & Pairings
Serve your crispy fried chicken alongside classic comfort sides like creamy coleslaw or fluffy biscuits. A side of honey or hot sauce can add a delightful zing. Don’t forget a refreshing glass of iced tea or lemonade to wash it all down!
Storage & Leftovers Guide
Leftover fried chicken can be stored in an airtight container in the refrigerator for up to 3 days. To maintain the crispiness, reheating in an oven at 375°F for about 15-20 minutes is recommended.
Kitchen Wisdom & Success Tips
- Make sure to let your chicken marinate long enough; overnight is ideal for maximum flavor.
- Use a thermometer for the oil; this ensures your chicken will cook perfectly without becoming greasy.
- If you want stunningly crunchy chicken, try adding a bit of crushed cornflakes to your coating.
Flavor Variations & Adaptations
Feeling adventurous? Experiment with different spices in your flour mixture—try cumin or smoked paprika for a new twist! For a gluten-free option, swap all-purpose flour with gluten-free flour blends or almond flour.
Reader Questions & Solutions
-
How do I know when my chicken is cooked?
Use a meat thermometer! The internal temperature should reach 165°F (74°C) for safety. -
Can I bake instead of frying?
Yes! Bake your chicken at 425°F (220°C) for about 25-30 minutes, flipping halfway through for a healthier alternative. -
What do I do if my coating falls off?
Make sure to let the chicken rest before frying. This helps the coating stick better. -
Can I use other types of chicken?
Absolutely! Any cut will work, but ensure they are all of similar size to cook uniformly. -
How can I prevent oil splatter?
Use a splatter screen, or gently lower the chicken into the oil to minimize splashes.
Wrapping Up
With this crispy fried chicken recipe, you’re not just preparing a meal—you’re creating memories around the table. Whether it’s a casual family dinner or a festive gathering, this dish will surely earn a place in your heart and on your dinner table. So don your apron, gather your loved ones, and let the crispy fun begin! Happy cooking!
PrintCrispy Fried Chicken

Experience the warmth and comfort of homemade crispy fried chicken with a flavorful buttermilk marinade and a crunchy double coating.
- Prep Time: 240 minutes
- Cook Time: 30 minutes
- Total Time: 270 minutes
- Yield: 4-6 servings 1x
- Category: Main Course
- Method: Frying
- Cuisine: American
- Diet: None
Ingredients
- 3 pounds chicken pieces (drumsticks, thighs, breasts)
- 2 cups buttermilk
- 2 cups all-purpose flour
- 1 cup cornstarch
- 2 tablespoons paprika
- 2 teaspoons garlic powder
- 2 teaspoons onion powder
- 1 teaspoon cayenne pepper
- 2 teaspoons black pepper
- 1 tablespoon salt
- 2 large eggs
- Vegetable oil for frying
Instructions
- Soak the Chicken: Place chicken pieces in a large bowl or zip-top bag. Pour buttermilk over the chicken, ensuring all pieces are completely submerged. Cover and refrigerate for at least 4 hours or overnight for best results.
- Prepare the Coating Mixture: In a large shallow dish, combine flour, cornstarch, paprika, garlic powder, onion powder, cayenne pepper, black pepper, and salt. Mix thoroughly with a whisk or fork.
- Make the Egg Wash: In a separate bowl, beat the eggs with 2 tablespoons of water to create an egg wash.
- Dredge the Chicken: Remove chicken from buttermilk, allowing excess to drip off. Dredge each piece in the seasoned flour mixture, coating completely.
- Egg Wash Time: Dip the coated chicken into the egg wash, then return to the flour mixture for a second coating.
- Rest the Coated Chicken: Place coated chicken on a wire rack and let rest for 15 minutes before frying.
- Heat the Oil: Fill a large pot or deep fryer with vegetable oil to about 3 inches deep. Heat oil to 350°F (175°C).
- Fry the Chicken: Carefully place 3-4 chicken pieces into the hot oil, frying for 12-15 minutes until golden brown and fully cooked.
- Drain the Chicken: Remove cooked chicken and drain on a wire rack or paper towels.
- Allow to Rest: Let fried chicken rest on a wire rack for 5 minutes before serving.
Notes
For maximum flavor, marinate the chicken overnight. Use a thermometer for oil temperature to achieve perfect frying results.
Nutrition
- Serving Size: 1 serving
- Calories: 400
- Sugar: 1g
- Sodium: 800mg
- Fat: 20g
- Saturated Fat: 5g
- Unsaturated Fat: 15g
- Trans Fat: 0g
- Carbohydrates: 30g
- Fiber: 1g
- Protein: 30g
- Cholesterol: 150mg