There’s something beautiful about homemade hummus — it’s an offering of love wrapped in smooth, creamy goodness. As someone who cherishes culinary traditions, my journey with hummus began during sunny afternoons spent in my grandmother’s kitchen, where she would whip up this glorious dip using simple ingredients. The rich, nutty flavor of tahini, the zesty punch of lemon, and the comforting warmth of garlic would fill the air just as a well-worn pita bread — warm and inviting — would melt into her gentle touch. There’s a story behind every dish we make, and this is one I love to share through my own rendition of her timeless hummus recipe.
Recipe Timing
- Prep Duration: 10 minutes
- Active Cooking: 5 minutes
- Total Duration: 15 minutes
- Portion Size: Serves 4
- Complexity: Simple
Nutritional Recipe
- Calories per portion: 120
- Protein: 4g
- Carbs: 14g
- Fats: 7g
- Fiber: 4g
- Sugars: 0g
- Sodium: 300mg
Why You’ll Love This Hummus Recipe Homemade
This hummus recipe not only celebrates the traditional Middle Eastern flavors but also allows you to customize every aspect of it. It’s creamy yet light on the palate, bursting with fresh flavors that will make your taste buds dance. Plus, it’s incredibly easy to prepare, making it a favorite for gatherings, snacks, or a healthy spread for your kids’ lunches. It’s versatile enough for any occasion, ready to pair with fresh vegetables, pita, or even slathered on sandwiches!
The Complete Cooking Journey
Let me guide you through this simple process where we will transform a few pantry staples into an irresistible, velvety hummus. You’ll not only feel accomplished but also discover how easy it is to make a flawless hummus right at home.
Ingredients:
- 1 can chickpeas (15 oz)
- 1/4 cup tahini
- 2 tablespoons olive oil
- 1 lemon (juiced)
- 1-2 garlic cloves
- Salt to taste
- Water as needed
- Paprika for garnish
- Fresh parsley for garnish (optional)
Method:
Step 1: Rinse and Drain the Chickpeas
To start, grab your can of chickpeas, and give it a good drain. Rinse them under cold water in a strainer to wash away that canning liquid. This will help keep your hummus fresh and flavorful.
Step 2: Combine the Ingredients
In your trusty food processor, toss in the rinsed chickpeas, tahini, olive oil, lemon juice, garlic cloves, and a sprinkle of salt. You’re creating a blend that forms the heart of your hummus.
Step 3: Blend to Perfection
Now, let your food processor do the magic! Blend the mixture until it’s nice and smooth. If it looks a bit thick or chunky and isn’t cooperating, don’t fret! Just add a little water, about a tablespoon at a time, until it reaches your desired creamy consistency.
Step 4: Adjust the Flavor
Give your hummus a taste. Does it need a pinch more salt? Maybe you want it tangier? This is your hummus, so adjust it to your liking!
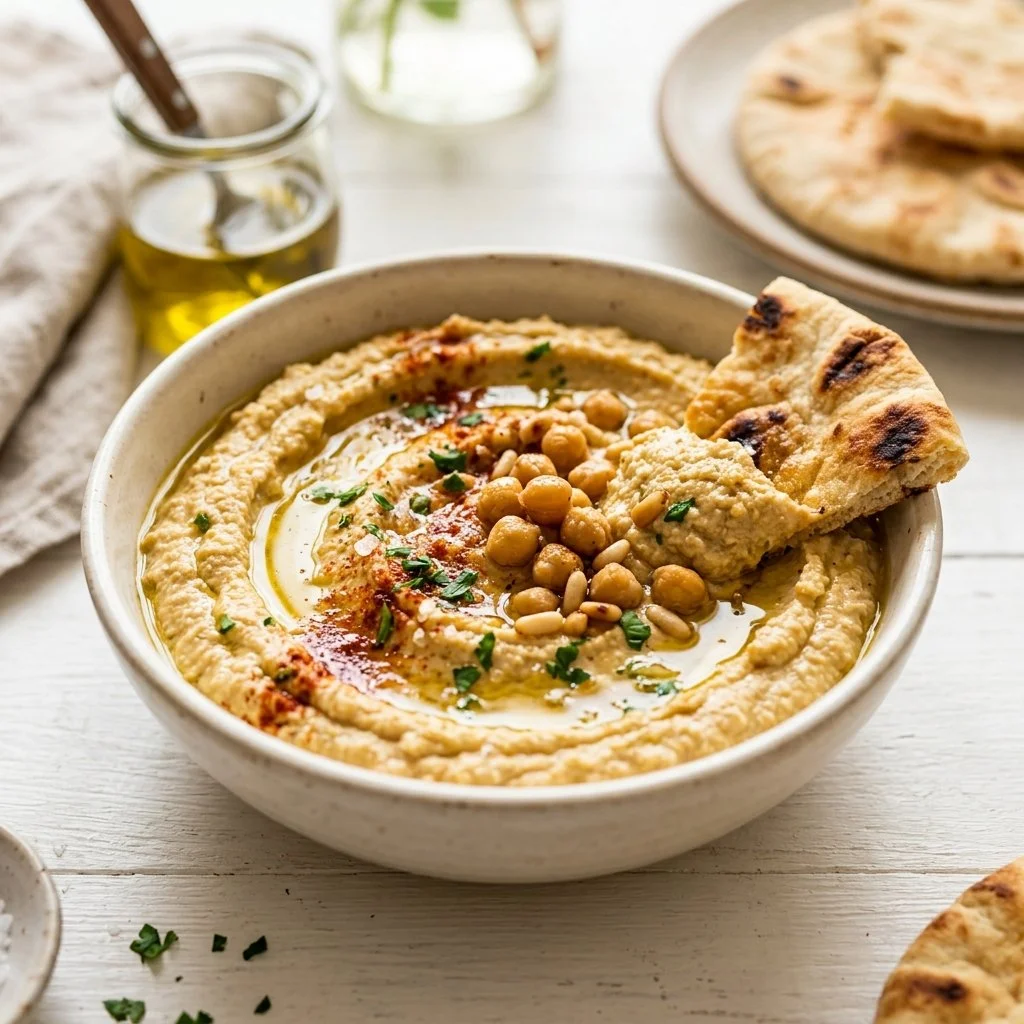
Step 5: Assemble and Garnish
Transfer your beautiful creation into a serving bowl. Drizzle with a little olive oil on top and sprinkle with paprika and fresh parsley if you’re feeling fancy. The colors alone will have everyone excited to dive in!
Step 6: Serve with Love
Now the fun part! Serve your hummus with warm pita bread or an array of fresh vegetables like carrots, cucumbers, and bell peppers. Watch as friends and family gather around, ready to dip and enjoy!
Serving Suggestions & Pairings
This hummus is incredibly versatile! Pair it with crudités for a refreshing snack or serve it as a spread in sandwiches or wraps. Hosting a gathering? Offer an array of dippables — think roasted pita chips, crispy veggies, olives, or even a charcuterie board alongside your hummus for an impressive spread.
Storage & Leftovers Guide
If you have any leftovers (though I doubt it with how delicious this is!), store your hummus in an airtight container in the refrigerator where it will last for up to a week. Just give it a stir before serving again. You can also freeze it for up to three months, allowing you to enjoy a homemade treat anytime.
Kitchen Wisdom & Success Tips
- Smoothness Tip: For extra smooth hummus, peel the skins off the chickpeas after rinsing. Yes, it’s a bit tedious, but it makes for an incredibly creamy final product!
- Garlic Preference: Adjust the garlic based on your taste. Start with one clove and then add more if you want an extra kick.
- Tahini Substitute: If tahini isn’t available, you can blend toasted sesame seeds with a light oil until creamy for a quick alternative.
Flavor Variations & Adaptations
Feel free to get creative! Want a chickpea-free version? Try adding roasted red peppers for a smoky flavor. Craving something spicy? Sriracha or a pinch of cayenne can elevate your hummus to new heights. You could even blend in avocado for a creamy twist.
Reader Questions & Solutions
- Can I use dried chickpeas? Absolutely! Just soak them overnight and cook until tender.
- Why does my hummus taste bitter? This could be the tahini. Try using a different brand or adjusting the amount you put in.
- How do I thicken my hummus? If your hummus is too thin, add more chickpeas, tahini, or even some ground nuts to form a thicker consistency.
- Can I make this in advance? Yes! Hummus keeps well in the fridge, making it perfect for meal prep.
- How can I make my hummus more nutritious? Add nutritional yeast for a cheesy flavor or incorporate some spinach or kale for added greens!
Wrapping Up
I hope you feel inspired to whip up this delicious homemade hummus. It’s more than just a recipe; it’s a gateway into creating something beautiful in your kitchen that brings family and friends together. Remember, it’s all about the joy of cooking and the stories we share around the table. So, roll up your sleeves, blend those flavors, and relish every bite of your homemade goodness. Enjoy!