
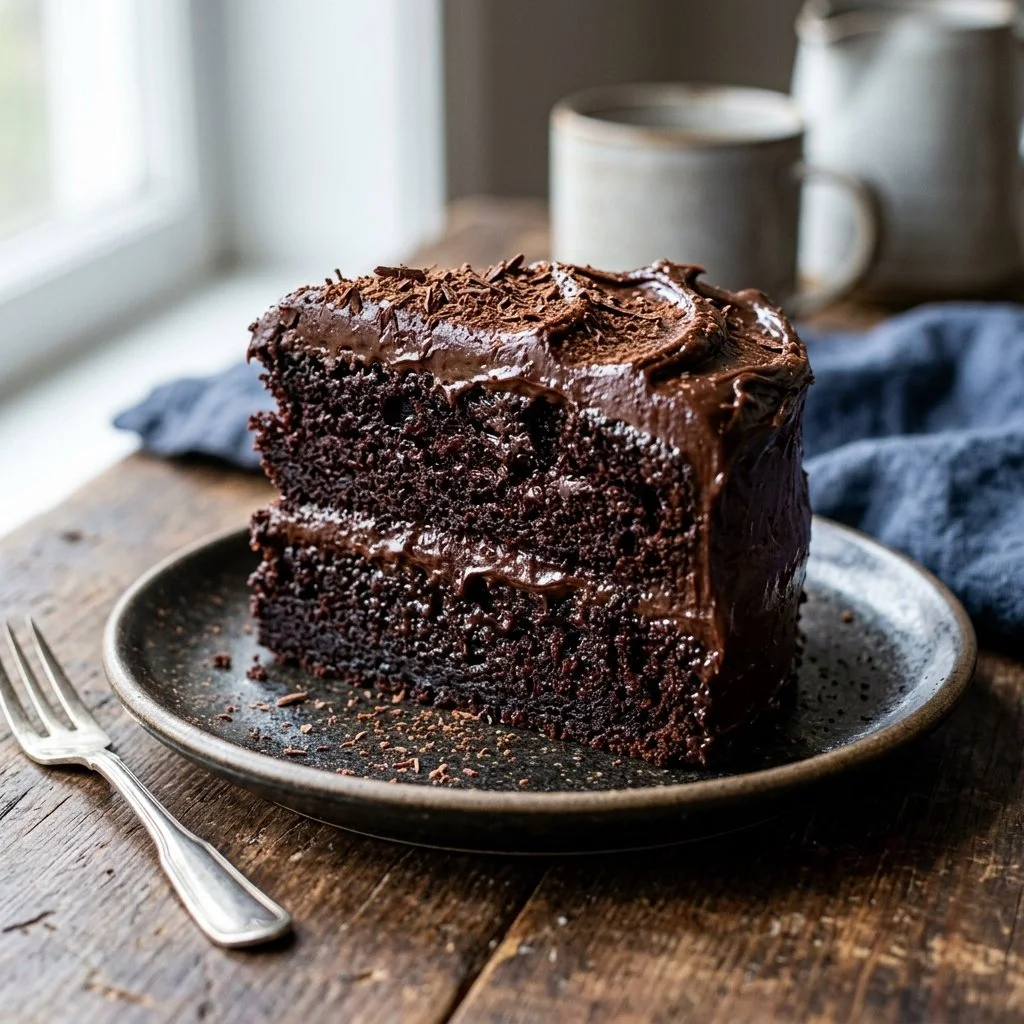
Chocolate lovers, gather around! If there’s one dessert that has the power to evoke a sense of nostalgia and pure joy, it’s the rich, decadent Devil’s Food Cake. I can still remember the first time I was introduced to this chocolate wonder. It was during my childhood at a friend’s birthday party, where the sight of that dark, moist cake topped with velvety frosting felt almost magical. Every slice was a piece of heaven, and I left the party dreaming about how to recreate that experience at home.
Now, every time I bake a Devil’s Food Cake, it feels like a warm embrace of comfort and indulgence. The aroma of cocoa wafting through the kitchen is irresistible, and the satisfaction of slicing into a beautifully baked cake that is as soft as a cloud is simply unmatched. Whether you’re celebrating a special occasion or just craving something sweet, this cake is sure to impress—not only for its taste but for the beautiful memories it brings back.
## Recipe Timing
- Prep Duration: 15 minutes
- Active Cooking: 30-35 minutes
- Total Duration: About 1 hour
- Portion Size: Serves about 12
- Complexity: Simple
## Nutritional Recipe
- Calories per portion: Approximately 380
- Protein: 4g
- Carbs: 56g
- Fats: 15g
- Fiber: 1g
- Sugars: 37g
- Sodium: 350mg
## Why You’ll Love This Devil’s Food Cake
This Devil’s Food Cake is not just any cake; it’s a chocolate lover’s dream come true. The rich cocoa flavor paired with its moist, tender crumb will leave you craving more. The addition of boiling water creates a texture that is profoundly light yet decadent, making each bite feel like a delightful indulgence. Whether enjoyed plain, dusted with powdered sugar, or slathered with your favorite frosting, this cake shines as the star of any dessert table.
## The Complete Cooking Journey
Baking this cake is as enjoyable as eating it! From the moment you mix your dry ingredients to the moment the glorious cake emerges from the oven, you’ll feel a sense of pride and anticipation. You’ll laugh at the mess in your kitchen, get your hands a little dirty, and maybe even smear some cake batter on your face (or is that just me?). As you pour the boiling water into the batter, you’ll marvel at how something so thin can transform into such a luscious creation.
## Ingredients:
- 1 3/4 cups all-purpose flour
- 3/4 cup unsweetened cocoa powder
- 2 cups granulated sugar
- 1 1/2 teaspoons baking powder
- 1 1/2 teaspoons baking soda
- 1 teaspoon salt
- 2 large eggs
- 1 cup whole milk
- 1/2 cup vegetable oil
- 2 teaspoons vanilla extract
- 1 cup boiling water
## Method:
### Step 1: Preheat the Oven & Prepare Cake Pans
Preheat the oven to 350°F (175°C). Grease and flour two 9-inch round cake pans to ensure a flawless release after baking.
### Step 2: Combine Dry Ingredients
In a large bowl, combine the flour, cocoa powder, sugar, baking powder, baking soda, and salt. Whisk together until well mixed, letting the enticing chocolate scent inspire your baking journey.
### Step 3: Mix Wet Ingredients
Add the eggs, milk, vegetable oil, and vanilla extract to the bowl. Beat the mixture on medium speed for 2 minutes, delighting in the way the colors blend and the batter thickens.
### Step 4: Add Boiling Water
Now, stir in the boiling water. Don’t worry that the batter seems thin; this is the secret to a moist cake! Mix until combined, and prepare to be amazed.
### Step 5: Pour Batter into Pans
Pour the batter evenly into the prepared cake pans. You can do this confidently as you already know it’s going to be delicious!
### Step 6: Bake to Perfection
Bake for 30 to 35 minutes, or until a toothpick inserted in the center comes out clean. The anticipation will build as your kitchen fills with that heavenly chocolate aroma.
### Step 7: Cool Your Cakes
Once baking is complete, cool the cakes in the pans for 10 minutes. Then, carefully turn them out onto wire racks to cool completely. Resist the urge to dive in when they’re warm!
## Serving Suggestions & Pairings
Serve this cake as is, or amp up the indulgence with a layer of rich chocolate ganache or fluffy whipped cream. Fresh berries, such as raspberries or strawberries, pair wonderfully and add a pop of color. For an extra touch, sprinkle some sea salt on top for contrast!
## Storage & Leftovers Guide
Leftover cake can be stored in an airtight container at room temperature for up to 3 days. If you have more, refrigerate it, and it will last for about a week. Just remember to bring it back to room temperature before enjoying those delectable bites again!
## Kitchen Wisdom & Success Tips
- Make sure all your ingredients are at room temperature for even mixing.
- Don’t skip the step of greasing and flouring the pans; it makes a big difference in how your cake releases.
- If you’re frosting the cake, let it cool completely to avoid melting your frosting.
## Flavor Variations & Adaptations
Want to shake things up? Try adding a teaspoon of espresso powder for a deeper chocolate flavor or some orange zest for a citrus twist. You can even swap out the vegetable oil for melted butter for a richer taste, though it does change the texture slightly.
## Reader Questions & Solutions
-
Why is my cake too dense?
- Check your flour measurement. Spoon it into the measuring cup instead of scooping directly from the bag, which can pack it too densely.
-
What should I do if my cake sinks in the middle?
- Ensure your baking powder and baking soda are fresh, and avoid overmixing once you add the wet ingredients.
-
Can I make this cake ahead of time?
- Absolutely! Bake it a day in advance and store it in an airtight container.
-
What can I substitute for eggs?
- You can use 1/4 cup of applesauce or a flax egg (1 tablespoon ground flaxseed mixed with 3 tablespoons water) per egg.
-
How can I make this cake gluten-free?
- Substitute the all-purpose flour with a gluten-free blend that works well for baking.
## Wrapping Up
This Devil’s Food Cake is more than just a recipe; it’s an experience. It brings heartwarming comfort, evoking sweet memories while inviting new ones to be made. So grab your apron, get your ingredients, and step into the wonderful world of baking. Each slice is a celebration, each nibble a reminder of the joy found in simple pleasures. Happy baking!
PrintDevil’s Food Cake
A rich and decadent Devil’s Food Cake that evokes nostalgia and pure joy.
- Prep Time: 15 minutes
- Cook Time: 35 minutes
- Total Time: 50 minutes
- Yield: 12 servings 1x
- Category: Dessert
- Method: Baking
- Cuisine: American
- Diet: Vegetarian
Ingredients
- 1 3/4 cups all-purpose flour
- 3/4 cup unsweetened cocoa powder
- 2 cups granulated sugar
- 1 1/2 teaspoons baking powder
- 1 1/2 teaspoons baking soda
- 1 teaspoon salt
- 2 large eggs
- 1 cup whole milk
- 1/2 cup vegetable oil
- 2 teaspoons vanilla extract
- 1 cup boiling water
Instructions
- Preheat the oven to 350°F (175°C). Grease and flour two 9-inch round cake pans.
- Combine the flour, cocoa powder, sugar, baking powder, baking soda, and salt in a large bowl.
- Add the eggs, milk, vegetable oil, and vanilla extract, beating on medium speed for 2 minutes.
- Stir in the boiling water until combined.
- Pour the batter evenly into the prepared cake pans.
- Bake for 30 to 35 minutes or until a toothpick inserted in the center comes out clean.
- Cool the cakes in the pans for 10 minutes, then turn them onto wire racks to cool completely.
Notes
Make sure all ingredients are at room temperature for even mixing. Grease and flour the pans to help the cake release easily.
Nutrition
- Serving Size: 1 slice
- Calories: 380
- Sugar: 37g
- Sodium: 350mg
- Fat: 15g
- Saturated Fat: 4g
- Unsaturated Fat: 9g
- Trans Fat: 0g
- Carbohydrates: 56g
- Fiber: 1g
- Protein: 4g
- Cholesterol: 70mg