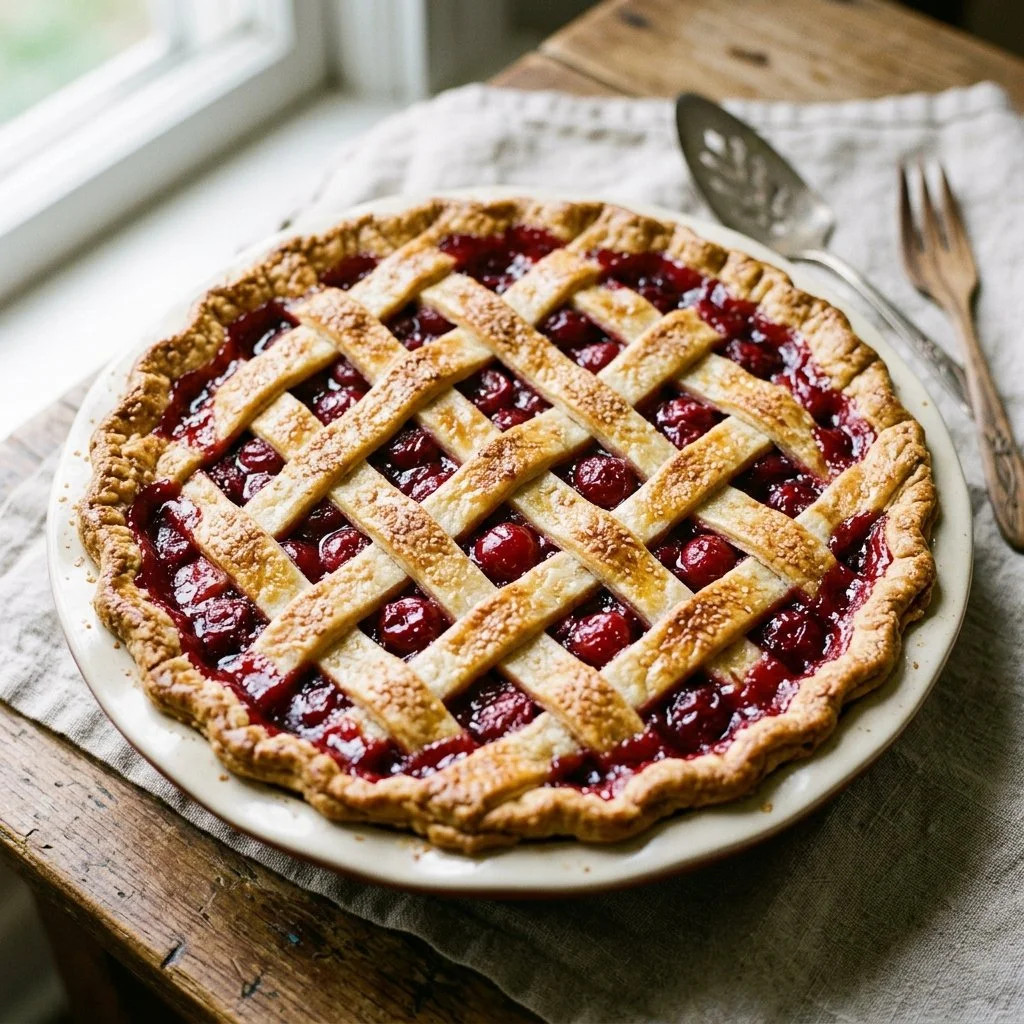
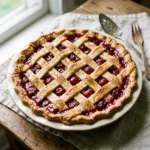
When I think of summer, I am instantly transported back to my childhood, where warm afternoons were filled with laughter, sunshine, and the sweet, tart scent of cherry pie wafting through my grandmother’s kitchen. Each time she baked one, it felt like a special event—an edible masterpiece nestled perfectly within a buttery, flaky crust. It was more than just dessert; it was a gathering point for family, filled with stories shared over the kitchen table. As I reminisce about those days, it inspires me to create my own cherry pie, one that encapsulates the joy and love of those cherished moments.
Recipe Timing
- Prep Duration: 15 minutes
- Active Cooking: 35-40 minutes (including baking)
- Total Duration: 50-55 minutes
- Portion Size: Serves 8
- Complexity: Simple
Nutritional Recipe
- Calories per portion: Approximately 250
- Protein: 2g
- Carbs: 38g
- Fats: 10g
- Fiber: 2g
- Sugars: 20g
- Sodium: 150mg
Why You’ll Love This Homemade Cherry Pie
This Homemade Cherry Pie is a delightful balance of sweet and tart, perfectly encapsulated within a golden brown crust. The vibrant cherries, whether fresh from the tree or frozen off-season, burst with flavor in every bite. The almond extract adds an unexpected warmth, elevating the pie to something truly special. It’s perfect for summer picnics, holiday gatherings, or simply a comforting finale to a weeknight dinner. Plus, it’s incredibly simple to prepare, making it accessible for even novice bakers!
The Complete Cooking Journey
As you prepare this pie, the process is as enjoyable as the final result. From pitting the cherries to watching the pie bake and fill the kitchen with a tantalizing aroma, it’s a heartfelt journey. Each step comes with its own rewards, whether it’s the satisfaction of rolling out dough or the anticipation of digging into that first slice. Don’t rush—savor every moment of your baking adventure!
Ingredients:
- 2 cups fresh or frozen cherries, pitted
- 1 cup sugar
- 1/4 cup cornstarch
- 1 tablespoon lemon juice
- 1/2 teaspoon almond extract
- 1 tablespoon butter
- 1 package refrigerated pie crusts (or homemade)
- 1 egg (for egg wash)
Method:
Step 1: Preheat the Oven
Preheat oven to 425°F (220°C).
Step 2: Prepare the Cherry Filling
In a large bowl, combine the cherries, sugar, cornstarch, lemon juice, and almond extract. Stir until cherries are well coated in this luscious mixture.
Step 3: Roll Out the First Pie Crust
Roll out one pie crust and place it in a 9-inch pie pan. The crust should hang slightly over the edges—as you’ll want a nice seal when sealing in those delectable cherries!
Step 4: Fill the Pie Crust
Pour the cherry filling into the crust, distributing it evenly. Don’t forget to dot the filling with butter for an extra rich flavor!
Step 5: Assemble the Top Crust
Roll out the second pie crust and place it over the filling. Seal and flute the edges for that classic pie look. Cut several slits in the top crust to allow steam to escape during baking.
Step 6: Apply the Egg Wash
Brush the top of the pie with a beaten egg for a beautifully golden finish once baked.
Step 7: Bake to Perfection
Bake for 30-35 minutes or until the crust is a rich golden brown and the filling is bubbly and inviting.
Step 8: Cool Before Serving
Let the pie cool before slicing. Trust me, the wait is worth it!
Serving Suggestions & Pairings
Serve your cherry pie warm, with a scoop of vanilla ice cream melting over the top. For a more elevated presentation, whip up some homemade whipped cream and add a sprinkle of almond slivers for good measure. Pair it with a light summer salad or a picnic spread featuring local cheeses and fresh fruits for a memorable meal.
Storage & Leftovers Guide
If you have any leftovers (a rare occurrence, I assure you), store them in an airtight container in the fridge for up to 3 days. You can also freeze slices! Wrap them tightly in plastic wrap and aluminum foil before placing them in a freezer-safe container for up to 2 months. Just remember to thaw in the fridge overnight before enjoying!
Kitchen Wisdom & Success Tips
- Cherries: Use seasonal, fresh cherries for the best flavor. If using frozen cherries, make sure to thaw and drain excess moisture.
- Cornstarch: This is key to thickening your filling. Don’t skip it!
- Crust: A homemade crust is fantastic, but a refrigerated one saves time and effort.
- Egg Wash: For added shine, ensure you brush the edges of the crust too—this helps achieve that glistening effect.
- Cooling Time: Let the pie cool before serving; this helps set the filling and makes for neater slices.
Flavor Variations & Adaptations
Feel free to mix things up! Add a teaspoon of cinnamon or nutmeg for a spiced cherry pie. For a twist, combine cherries with blueberries or a splash of bourbon for a sophisticated kick. You can even swap almond extract for vanilla extract for a different flavor profile.
Reader Questions & Solutions
-
What should I do if my filling is runny?
If your cherry filling turns out runny, add a bit more cornstarch to it before it bakes to help thicken the juices as they cook. -
Can I use canned cherries?
Yes, but remember to drain them well and reduce the sugar since canned cherries are often packed in syrup. -
How can I make my crust flakier?
Keep your butter very cold and avoid overworking the dough. Using a food processor can help with this. -
What if I run out of cherries?
Substitute with other fruits like peaches or cranberries—each will provide a delicious pie with a unique twist! -
How do I know my pie is done?
Look for a bubbly filling and a crust that’s golden brown. An internal temperature of about 200°F (93°C) is ideal for fruit pies.
Wrapping Up
As you embark on the adventure of making this Homemade Cherry Pie, embrace each step, savor the aroma of baking, and relish the joy it brings to your table. Whether enjoyed with family or shared amongst friends, this classic dessert is a celebration of wholesome ingredients, heartfelt memories, and the love of cooking. So preheat that oven, gather your cherries, and create something deliciously magical!
PrintHomemade Cherry Pie
A delightful balance of sweet and tart, perfectly encapsulated within a golden brown crust, making it ideal for summer picnics and holiday gatherings.
- Prep Time: 15 minutes
- Cook Time: 35 minutes
- Total Time: 50 minutes
- Yield: 8 servings 1x
- Category: Dessert
- Method: Baking
- Cuisine: American
- Diet: Vegetarian
Ingredients
- 2 cups fresh or frozen cherries, pitted
- 1 cup sugar
- 1/4 cup cornstarch
- 1 tablespoon lemon juice
- 1/2 teaspoon almond extract
- 1 tablespoon butter
- 1 package refrigerated pie crusts (or homemade)
- 1 egg (for egg wash)
Instructions
- Preheat the oven to 425°F (220°C).
- Combine the cherries, sugar, cornstarch, lemon juice, and almond extract in a large bowl. Stir until cherries are well coated.
- Roll out one pie crust and place it in a 9-inch pie pan.
- Pour the cherry filling into the crust, distributing it evenly, and dot with butter.
- Roll out the second pie crust and place it over the filling. Seal and flute the edges, cutting slits in the top crust.
- Brush the top of the pie with a beaten egg.
- Bake for 30-35 minutes, or until the crust is golden brown and the filling is bubbly.
- Let the pie cool before slicing.
Notes
Serve warm with vanilla ice cream or homemade whipped cream. Store leftovers in an airtight container for up to 3 days or freeze for up to 2 months.
Nutrition
- Serving Size: 1 slice
- Calories: 250
- Sugar: 20g
- Sodium: 150mg
- Fat: 10g
- Saturated Fat: 4g
- Unsaturated Fat: 6g
- Trans Fat: 0g
- Carbohydrates: 38g
- Fiber: 2g
- Protein: 2g
- Cholesterol: 30mg