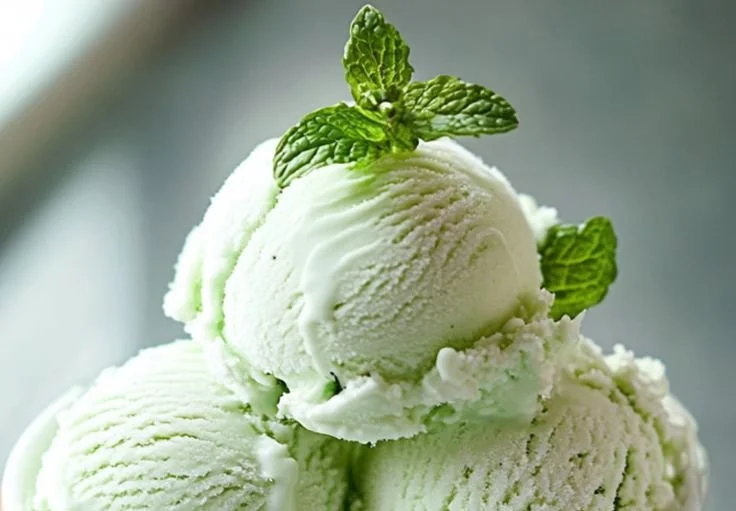
As the summer sun begins to dip below the horizon, painting the sky with hues of orange and pink, there’s a certain kind of magic that fills the air. It’s the promise of warm evenings spent outdoors, laughter echoing through the garden, and, most importantly, the sweet treat that cools us down after a long, hot day—ice cream. Right at the forefront of my childhood memories is the thrill of crafting a unique flavor, and nothing has captivated my palate quite like homemade fresh mint ice cream. Today, I’m excited to share not just a recipe, but a journey into the delightful world of this refreshing dessert.
Recipe Timing
- Prep Duration: 15 minutes
- Active Cooking: 20 minutes
- Total Duration: 1 hour (plus cooling and freezing time)
- Portion Size: Serves approximately 6-8
- Complexity: Moderate
Nutritional Recipe
- Calories per portion: 295
- Protein: 3 grams
- Carbs: 25 grams
- Fats: 22 grams
- Fiber: 0 grams
- Sugars: 20 grams
- Sodium: 70 mg
Why You’ll Love This Homemade Fresh Mint Ice Cream
There’s something incredibly special about making ice cream at home. You control every step, ensuring it’s rich, creamy, and bursting with fresh mint flavor. The essential oils released from the mint leaves during steeping create a bright and fragrant base that elevates this treat to a whole new level. Whether you scoop it into a cone or dollop it into a bowl, each bite is a delightful escape to warm summer days.
The Complete Cooking Journey
While the preparation of this refreshing treat may seem like a lengthy process, I assure you that it’s time well spent. By allowing the mint to steep, you infuse every scoop with a fragrant burst of flavor that simply cannot be replicated with store-bought varieties.
Ingredients:
- 2 cups heavy cream
- 1 cup whole milk
- 1 cup fresh mint leaves
- 3/4 cup granulated sugar
- 1 teaspoon vanilla extract
- Pinch of salt
- 4 large egg yolks
Method:
Step 1: Combine Cream, Milk, and Sugar
In a saucepan, combine the heavy cream, whole milk, and granulated sugar over medium heat. Stir gently until the sugar dissolves completely, filling your kitchen with a lovely, sweet aroma.
Step 2: Add Fresh Mint Leaves and Simmer
Once the sugar is dissolved, add your fresh mint leaves and bring the mixture to a gentle simmer. This step is crucial as it allows the mint to release its oils and flavor into the mixture.
Step 3: Steep the Mint
Remove the saucepan from the heat, cover it with a lid, and let the mint steep for about 30 minutes. Use this time to reflect on all the delightful moments that ice cream has brought you.
Step 4: Strain the Mixture
After steeping, pour the mint-infused mixture through a strainer to remove the mint leaves. This keeps your ice cream smooth and creamy without any leafy bits.
Step 5: Whisk Egg Yolks
In a separate bowl, whisk together the egg yolks. This is where the magic of creaminess begins!
Step 6: Combine Egg Yolks with Mixture
Slowly add the strained mint mixture to the bowl of egg yolks while whisking continuously. This technique is known as tempering and ensures the eggs don’t scramble in the warm mixture.
Step 7: Thicken the Custard
Return the mixture to the saucepan and cook on low heat. Stir continuously until the custard thickens enough to coat the back of a spoon. It’s a beautiful moment when you see it change in texture!
Step 8: Add Vanilla and Salt
Remove from heat and stir in the vanilla extract and a pinch of salt. The vanilla complements the mint beautifully while balancing the sweetness.
Step 9: Cool and Churn
Cool the mixture completely before pouring it into your ice cream maker. Churn according to the manufacturer’s instructions until it’s thick and creamy.
Step 10: Freeze until Firm
Transfer the ice cream to a container and freeze it until firm—this may take several hours, but it will be worth the wait!
Serving Suggestions & Pairings
This fresh mint ice cream pairs brilliantly with dark chocolate sauce or topped with fresh berries. For a nostalgic twist, serve it alongside homemade warm chocolate chip cookies—the warmth contrasts with the cold ice cream, creating an unforgettable duo.
Storage & Leftovers Guide
Store any leftover ice cream in an airtight container in the freezer for up to two weeks. For best results, let it sit at room temperature for a few minutes before serving to soften it slightly.
Kitchen Wisdom & Success Tips
- Make sure to use fresh mint for the best flavors. Dry mint won’t replicate the brightness you want.
- For an extra minty flavor, consider adding a few drops of mint extract after you’ve combined the mixture.
- Ensure you cool your mixture completely before adding it to your ice cream maker, as this enhances the texture.
Flavor Variations & Adaptations
Feel free to explore! Add dark chocolate chips or swirl in a homemade fudge sauce for a layer of richness. You could also turn this into a mint chip ice cream by adding chocolate flakes during the churning process.
Reader Questions & Solutions
-
Can I use dried mint instead of fresh?
While you can, fresh mint provides a much livelier flavor. -
What if I don’t have an ice cream maker?
You can freeze the mixture in a shallow dish, stirring every 30 minutes until it reaches the desired consistency. -
Is it possible to make this dairy-free?
Absolutely! Substitute coconut milk for heavy cream and almond or soy milk for whole milk. -
How can I tell when my custard is thick enough?
It’s ready when it coats the back of a spoon—run your finger through it, and the line should hold. -
What should I do if my ice cream turns out too icy?
This can happen from air and temperature exposure. Try not to leave it in the freezer too long and consider churning it for a longer time.
Wrapping Up
Creating homemade fresh mint ice cream is more than just tossing a few ingredients together; it’s about nurturing moments, celebrating the flavors of summer, and treating yourself and loved ones to something truly special. So dive into this recipe, unleash your inner ice cream artisan, and savor every luscious spoonful!