Huckleberries. Just the sound of their name conjures up images of sunlit forests and lazy summer afternoons. I have treasured memories of gathering these tiny, wild berries with my family. These sweet little gems, bursting with flavor, always felt like jewels waiting to be discovered. Fast-forward to today, and every bite of a huckleberry cream pie transports me back to those moments, reminding me of the magic of simple pleasures in life. Today, I’m excited to share with you a delightful recipe that encapsulates those same feelings: a luscious Huckleberry Cream Pie.
Recipe Timing
- Prep Duration: 20 minutes
- Active Cooking: 15 minutes
- Total Duration: 2 hours 35 minutes (including chilling time)
- Portion Size: Serves 8
- Complexity: Simple
Nutritional Recipe
- Calories per portion: Approximately 300
- Protein: 2g
- Carbs: 38g
- Fats: 17g
- Fiber: 2g
- Sugars: 22g
- Sodium: 50mg
Why You’ll Love This Huckleberry Cream Pie
This Huckleberry Cream Pie is not just another dessert; it’s a celebration of flavor and nostalgia all in one. The fresh or frozen huckleberries bring a tart sweetness that perfectly balances the creamy, whipped topping. It’s light yet indulgent, making it a fantastic choice for summer barbecues, potlucks, or a cozy night in. Not to mention, it’s easy to make with just a few simple ingredients and can be prepped ahead, so you have more time to enjoy with family and friends.
The Complete Cooking Journey
Embarking on this cooking journey feels like walking through a sun-drenched forest, ready to find every little gem. Each step is simple and straightforward, but as you layer the flavors and textures, you’ll find yourself falling in love with this pie on a deeper level.
Ingredients:
- 1 pre-made 9-inch pie crust
- 2 cups huckleberries (Fresh or frozen, thawed and drained if frozen)
- 1 cup granulated sugar (Divided into ½ cup for huckleberry mixture and remaining for whipped cream)
- 2 tablespoons cornstarch
- 1 tablespoon lemon juice
- 1 cup heavy whipping cream
- 1 teaspoon vanilla extract
- ¼ teaspoon salt
Method:
Step 1: Preheat the Oven
Preheat your oven to 350°F (175°C). This step is crucial to achieving a crust that’s perfectly baked and golden.
Step 2: Prepare the Huckleberries
If you’re using fresh huckleberries, rinse and drain them thoroughly. For frozen huckleberries, simply thaw and drain any excess liquid. This ensures that your filling won’t be watery.
Step 3: Create the Filling
In a medium saucepan, combine the huckleberries, ½ cup sugar, cornstarch, and lemon juice. Cook over medium heat, stirring gently until the mixture starts to thicken and bubble, about 5-7 minutes. Once thick, remove from heat and let it cool.
Step 4: Whip the Cream
In a mixing bowl, add the heavy whipping cream, the remaining sugar, vanilla extract, and salt. Whip until soft peaks form, which will create a light, fluffy texture for your pie.
Step 5: Combine Huckleberry and Cream
Once the huckleberry mixture has cooled, gently fold half of the whipped cream into the huckleberry mixture until combined. Be gentle here; you want to keep that lightness in the whipped cream!
Step 6: Assemble the Pie
Spoon the combined huckleberry and whipped cream mixture into the pre-made pie crust. Smooth the top with a rubber spatula for an even finish.
Step 7: Garnish with Whipped Cream
Spread the remaining whipped cream over the top of the pie for decoration. This not only adds beauty but also enhances the creaminess!
Step 8: Chill and Set
Cover the pie with plastic wrap or aluminum foil and refrigerate for at least 2 hours. This cooling period allows the flavors to meld and the dessert to set perfectly.
Step 9: Serve and Enjoy!
Slice, serve, and indulge in the bliss of homemade huckleberry cream pie!
Serving Suggestions & Pairings
This pie shines on its own, but pairing it with vanilla ice cream or a dollop of extra whipped cream can elevate the experience even more. A light summer salad or grilled chicken can make for a wonderful outdoor meal, followed by a slice of this pie for dessert.
Storage & Leftovers Guide
Cover the pie with plastic wrap and store it in the refrigerator for up to 3 days. If you need to store leftovers (if any!), it’s best to keep them chilled in a sealed container. Just remember that the texture will be best enjoyed fresh!
Kitchen Wisdom & Success Tips
- Look for ripe, plump huckleberries for the sweetest flavor.
- If you’re using frozen huckleberries, be sure to drain them well to avoid excess moisture.
- Don’t skip the chilling step; it’s key for the pie to hold its shape when you slice it.
Flavor Variations & Adaptations
Feel free to experiment! Add a teaspoon of almond extract for a nutty twist or mix in some lemon zest for a fresher flavor. You could even try substituting blueberries if huckleberries are not available.
Reader Questions & Solutions
-
Can I use other berries instead of huckleberries?
Yes, blueberries or blackberries are great substitutes! -
How can I make this pie gluten-free?
Simply use a gluten-free pre-made pie crust or make your own gluten-free crust from almond flour or coconut flour. -
What if I don’t have heavy whipping cream?
You can use a dairy-free alternative like coconut cream for a non-dairy version. -
How do I know when the filling is thick enough?
The filling should bubble and coat the back of a spoon when it’s ready. -
Can I freeze the pie?
It’s best enjoyed fresh, but if you’d like to freeze, you can do so, but the texture may change upon thawing.
Wrapping Up
There you have it—a delightful Huckleberry Cream Pie that brings together nostalgia, flavor, and simplicity in one stunning dessert. I hope this recipe inspires you to create your version, whether you’re sharing it at a gathering or savoring it during a quiet moment at home. Happy baking, and as always, embrace the joy that comes with sharing good food with those you love!
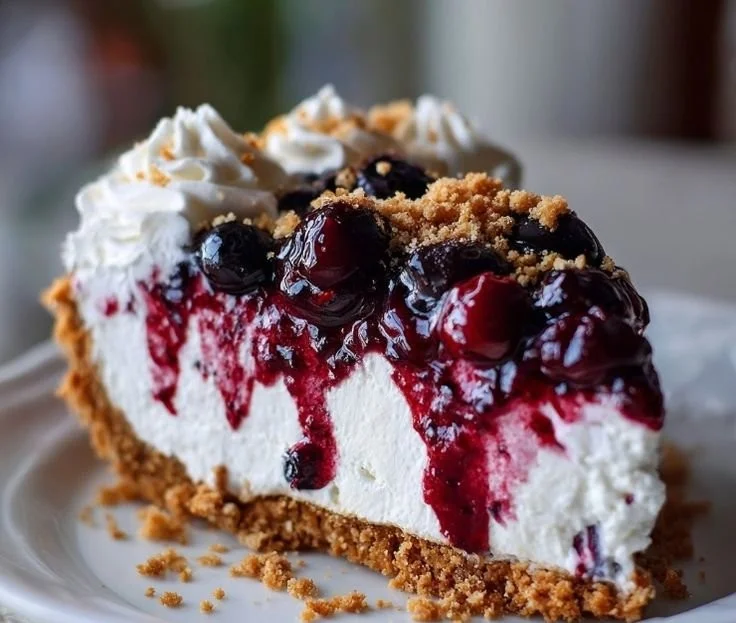
PrintHuckleberry Cream Pie

A luscious huckleberry cream pie that captures nostalgia and flavor, perfect for summer gatherings.
- Prep Time: 20 minutes
- Cook Time: 15 minutes
- Total Time: 155 minutes
- Yield: 8 servings 1x
- Category: Dessert
- Method: No-Bake
- Cuisine: American
- Diet: Vegetarian
Ingredients
- 1 pre-made 9-inch pie crust
- 2 cups huckleberries (fresh or frozen, thawed and drained if frozen)
- 1 cup granulated sugar (divided into ½ cup for huckleberry mixture and remaining for whipped cream)
- 2 tablespoons cornstarch
- 1 tablespoon lemon juice
- 1 cup heavy whipping cream
- 1 teaspoon vanilla extract
- ¼ teaspoon salt
Instructions
- Preheat your oven to 350°F (175°C).
- Prepare the huckleberries by rinsing if fresh or thawing if frozen.
- Create the filling by cooking huckleberries with ½ cup sugar, cornstarch, and lemon juice over medium heat until thickened.
- Whip the cream with remaining sugar, vanilla extract, and salt until soft peaks form.
- Combine half of the whipped cream into the cooled huckleberry mixture gently.
- Assemble the pie by spooning the huckleberry mixture into the pie crust.
- Garnish with the remaining whipped cream.
- Chill the pie in the refrigerator for at least 2 hours.
- Serve and enjoy your huckleberry cream pie!
Notes
For best flavor, use ripe huckleberries and ensure to chill the pie adequately.
Nutrition
- Serving Size: 1 slice
- Calories: 300
- Sugar: 22g
- Sodium: 50mg
- Fat: 17g
- Saturated Fat: 10g
- Unsaturated Fat: 7g
- Trans Fat: 0g
- Carbohydrates: 38g
- Fiber: 2g
- Protein: 2g
- Cholesterol: 0mg