I’ve always believed that the magic of baking resides not just in the recipes we create, but in the memories we forge while we’re making them. There’s something heartwarming about draping a luscious frosting over a cake or gently spreading it over warm cupcakes—each swirl wrapped with a story. That’s why today, I’m excited to share a gem from my kitchen: the Pressure Cooker Russian Buttercream. This decadent frosting is an experience in itself—rich, creamy, and a fabulous twist on traditional buttercreams that I just can’t wait for you to try!
Recipe Timing
- Prep Duration: 10 minutes
- Active Cooking: 15 minutes
- Total Duration: 25 minutes
- Portion Size: Makes enough for about 24 cupcakes or a two-layer cake
- Complexity: Simple
Nutritional Recipe
- Calories per portion: Approximately 150 calories
- Protein: 0.5 grams per serving
- Carbs: 20 grams per serving
- Fats: 8 grams per serving
- Fiber: 0 grams per serving
- Sugars: 12 grams per serving
- Sodium: 50 mg per serving
Why You’ll Love This Pressure Cooker Russian Buttercream Recipe
This rich buttercream breaks traditional molds—it’s not just about the flavor; it’s about simplicity and convenience. The pressure cooker generously speeds up the process, ensuring that you can whip up this silky frosting in no time. The blend of unsalted butter, sweetened condensed milk, and a hint of vanilla creates a frosting that’s not overly sweet yet deliciously creamy. Say goodbye to hours of mixing—it’s perfect for those last-minute baking adventures or when you want to impress guests with your baking prowess!
The Complete Cooking Journey
Imagine opening your pressure cooker to find a luscious, glossy buttercream that looks as dreamy as it tastes. The process begins with softening the butter, followed by incorporating the sweetened condensed milk, and finally, introducing just the right amount of vanilla and salt. Whipping it all together transforms these simple ingredients into something extraordinary—an experience that makes every bake feel truly special.
Ingredients:
- 226 g Unsalted butter (room temperature (1 cup or 2 sticks))
- 1 tsp Vanilla extract or vanilla bean paste
- 0.25 tsp Fine salt
- 396 g Sweetened condensed milk (14 oz can)
- Powdered sugar (optional, for adjusting sweetness and consistency)
Method:
### Step 1: Prepare Your Ingredients
Gather all your ingredients, allowing the butter to come to room temperature. This step is crucial for achieving that creamy texture we love.
### Step 2: Cream the Butter
In your mixing bowl, use an electric mixer to beat the butter until it’s smooth and pale. This usually takes about 2-3 minutes. Enjoy the sweet scent as it fills your kitchen!
### Step 3: Add Sweetened Condensed Milk
Gradually mix in the sweetened condensed milk, ensuring it combines well with the butter. The mixture should be velvety and luxurious.
### Step 4: Introduce Vanilla and Salt
Now, add the vanilla extract (or paste) and salt to enhance the flavor profile. Mix until completely blended.
### Step 5: Adjust Consistency with Powdered Sugar
This is the fun part! If you prefer a sweeter buttercream or need it thicker, sift in some powdered sugar. Mix well until you achieve the desired sweetness and consistency.
Serving Suggestions & Pairings
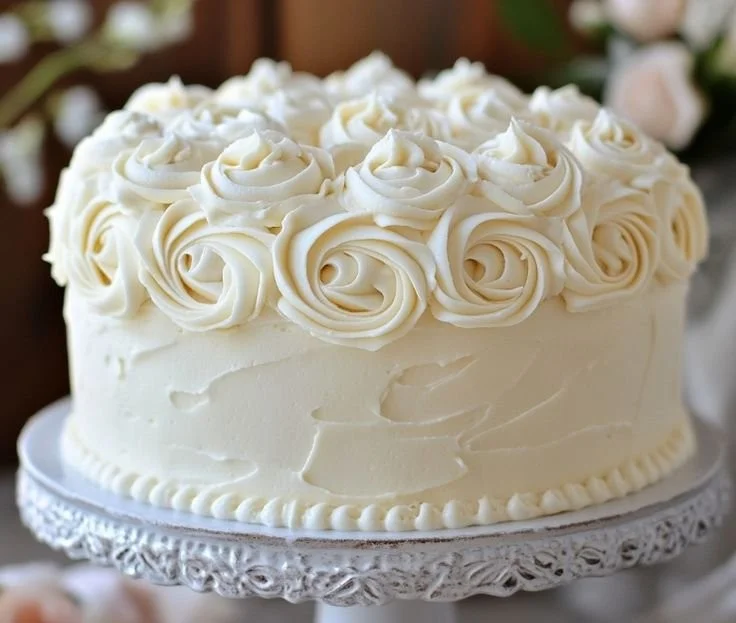
This frosting is perfect atop a classic chocolate cake or fluffy vanilla cupcakes. Feel free to spread it between layers of a cake, embellish with fresh berries, or even drizzle with caramel for an out-of-this-world dessert. You can also enjoy it as a dip for cookies, or simply enjoy it by the spoonful—no judgment here!
Storage & Leftovers Guide
If you have any leftovers (though I doubt it!), transfer the buttercream into an airtight container. It can be stored in the refrigerator for up to a week. Make sure to let it come to room temperature before using it again, as refrigeration can stiffen it up.
Kitchen Wisdom & Success Tips
- To ensure your butter is at the perfect temperature, let it sit at room temperature for 30 minutes to an hour before starting.
- Don’t rush the mixing process! Letting the butter and condensed milk blend thoroughly creates that silky texture.
- If your buttercream appears too soft, don’t hesitate to add a tablespoon of powdered sugar at a time until you reach your desired consistency.
Flavor Variations & Adaptations
Feeling adventurous? Add a tablespoon of cocoa powder for a chocolatey twist, or substitute half the sweetened condensed milk with a fruit purée, like raspberry or mango, for a refreshing variation. Experimenting with flavor extracts like almond or mint can also bring new dimensions to your buttercream.
Reader Questions & Solutions
-
Q: Can I use margarine instead of butter?
A: While margarine can work, it won’t provide the same rich flavor. Stick with unsalted butter for the best results. -
Q: What if my butter isn’t soft enough?
A: Try cutting it into smaller pieces and microwaving it for just a few seconds. Be careful not to melt it! -
Q: Can I freeze the buttercream?
A: Yes! It freezes wonderfully. Just ensure it’s in an airtight container and let it thaw in the fridge when you’re ready to use it. -
Q: How do I make it less sweet?
A: Start with less sweetened condensed milk. You can always add more later if needed. -
Q: Can I add food coloring?
A: Absolutely! Gel food colorings work best without altering the consistency. Just a few drops should do!
Wrapping Up
This Pressure Cooker Russian Buttercream isn’t just a recipe; it’s an invitation to create something delicious and share joy through baking. So, gather your ingredients, embrace your inner baker, and enjoy the process of creating something truly delightful. Whether it’s a birthday celebration or just a Tuesday afternoon, this buttercream can turn any moment into a special occasion. Happy baking, and may your culinary adventures be filled with sweetness!
PrintPressure Cooker Russian Buttercream
A rich, creamy frosting made quickly in a pressure cooker, perfect for cakes and cupcakes.
- Prep Time: 10
- Cook Time: 15
- Total Time: 25
- Yield: Makes enough for about 24 cupcakes or a two-layer cake
- Category: Dessert
- Method: Baking
- Cuisine: American
- Diet: Vegetarian
Ingredients
- 226 g Unsalted butter (room temperature, 1 cup or 2 sticks)
- 1 tsp Vanilla extract or vanilla bean paste
- 0.25 tsp Fine salt
- 396 g Sweetened condensed milk (14 oz can)
- Powdered sugar (optional, for adjusting sweetness and consistency)
Instructions
- Prepare your ingredients by gathering them and letting the butter come to room temperature.
- Cream the butter in a mixing bowl using an electric mixer until smooth and pale, about 2-3 minutes.
- Add the sweetened condensed milk gradually, mixing well until the mixture is velvety.
- Introduce the vanilla extract and salt, mixing until completely blended.
- Adjust the consistency with powdered sugar if preferred, mixing until desired sweetness and consistency are achieved.
Notes
Store leftovers in an airtight container in the refrigerator for up to a week. Let it come to room temperature before using.
Nutrition
- Serving Size: 1 serving
- Calories: 150
- Sugar: 12g
- Sodium: 50mg
- Fat: 8g
- Saturated Fat: 5g
- Unsaturated Fat: 3g
- Trans Fat: 0g
- Carbohydrates: 20g
- Fiber: 0g
- Protein: 0.5g
- Cholesterol: 30mg