There’s something truly magical about the sizzling sound of hash browns in a hot skillet. For many of us, these golden, crispy delights are more than just a breakfast staple—they evoke countless memories of cozy Sunday brunches, late-night snacks, and even spontaneous weekend gatherings. I remember the first time I tried my hand at making them. Armed with a simple recipe and a heap of eagerness, I discovered that creating the perfect hash brown isn’t just about following a recipe—it’s an experience filled with love, patience, and, of course, deliciousness.
Recipe Timing
- Prep Duration: 10 minutes
- Active Cooking: 15 minutes
- Total Duration: 25 minutes
- Portion Size: Serves 4
- Complexity: Simple
Nutritional Recipe
- Calories per portion: Approximately 180
- Protein: 3 grams per serving
- Carbs: 30 grams per serving
- Fats: 6 grams per serving
- Fiber: 2 grams per serving
- Sugars: 1 gram per serving
- Sodium: 300 mg per serving
Why You’ll Love This Quick and Easy Hash Browns Recipe
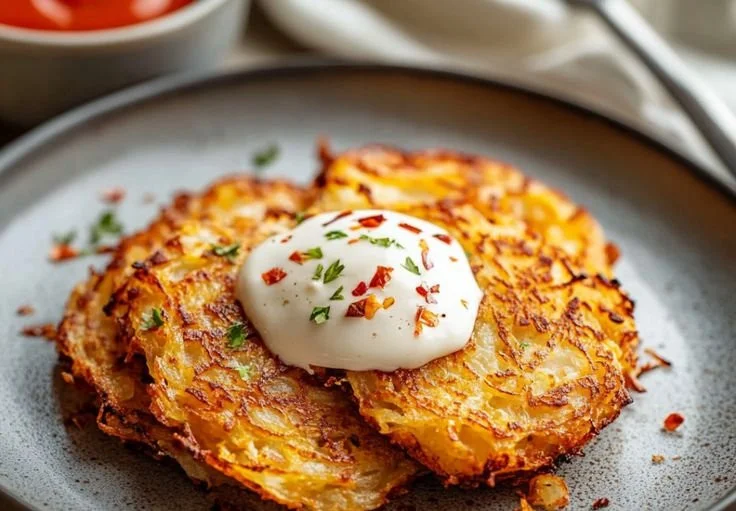
Hash browns are the culinary equivalent of a warm hug. They’re crispy on the outside, tender on the inside, and incredibly versatile. This recipe celebrates simplicity while allowing you to customize flavors with just a few ingredients—potatoes, onion, vegetable oil, salt, and pepper. Whether you serve them alongside eggs, bacon, or simply pile them high on a breakfast burrito, these hash browns are sure to elevate any meal. Plus, they’re super quick to whip up, making them perfect for busy mornings or lazy weekends.
The Complete Cooking Journey
Every journey starts with a single step, and here, we’re embarking on the delightful adventure of hash brown making. With each ingredient, each sizzle in the pan, you’ll feel your kitchen come alive. Gather your family or your closest friends around, and get ready for some fun in the kitchen!
Ingredients:
- 4 medium-sized Russet potatoes
- 1 medium onion
- 4 tablespoons vegetable oil (or more, if needed)
- Salt, to taste
- Pepper, to taste
Method:
Step 1: Prep the Potatoes
Start by peeling the potatoes and giving them a rinse under cool water. This helps to remove excess starch and makes your hash browns extra crispy! Once they’re all clean, grate the potatoes using a box grater or a food processor for a speedier approach.
Step 2: Drain & Dry
When the potatoes are grated, place them in a clean kitchen towel or cheesecloth. Gather the edges and twist to squeeze out as much moisture as possible; this step is crucial for that coveted crunch.
Step 3: Chop the Onion
While you’re draining your potatoes, finely chop the onion. This will infuse your hash browns with a delicious savory flavor.
Step 4: Mix It All Together
In a large bowl, combine the grated potatoes, chopped onion, salt, and pepper. Mix well, making sure the potatoes are evenly coated in seasoning.
Step 5: Heat the Skillet
In a large skillet, heat the vegetable oil over medium-high heat. You want enough oil to coat the bottom of the pan generously.
Step 6: Add the Potato Mixture
Carefully add the potato mixture to the heated oil, pressing it down into an even layer. Let it cook undisturbed for about 5 minutes until the bottom is golden brown.
Step 7: Flip & Finish Cooking
Using a large spatula, flip sections of the hash brown over to cook the other side. This may take some finesse, but don’t worry if it falls apart a little—rustic is charming! Cook for another 5-10 minutes until both sides are crispy and golden.
Step 8: Drain & Serve
When done, transfer the hash browns onto a plate lined with paper towels to absorb any excess oil. Serve hot and enjoy the well-deserved crunch!
Serving Suggestions & Pairings
These hash browns are delightful on their own, but why stop there? Pair them with fried eggs, crispy bacon, or even envelop them in a warm tortilla for a breakfast burrito. A dollop of sour cream or some fresh avocado slices can elevate the flavors even further. And if you’re feeling adventurous, top with shredded cheese for a melty, indulgent finish.
Storage & Leftovers Guide
Leftover hash browns can be stored in an airtight container in the fridge for up to 3 days. To reheat, simply place them in a skillet over medium heat until crispy again. You can also freeze leftover hash browns for up to 1 month—just ensure they’re cooled completely before transferring them to a freezer-safe container.
Kitchen Wisdom & Success Tips
- For extra crispy hash browns, make sure to dry the grated potatoes thoroughly.
- Use a cast-iron skillet if possible; it retains heat well and helps achieve that perfect golden crust.
- Play with seasonings! Adding garlic powder, paprika, or even fresh herbs can personalize your hash browns.
Flavor Variations & Adaptations
- Add diced bell peppers or jalapeños for a kick of flavor.
- Swap out the Russet potatoes for sweet potatoes for a healthier twist.
- Customize with different herbs like rosemary or thyme for a fragrant aroma.
Reader Questions & Solutions
-
Why are my hash browns soggy?
Ensure you remove excess moisture after grating the potatoes and use a hot skillet. -
Can I use pre-peeled or frozen potatoes?
While fresh potatoes yield the best texture, frozen hash browns work in a pinch! Just ensure they’re thawed and dried well. -
How do I keep my hash browns warm while I cook in batches?
Set your oven to 200°F and place a baking sheet inside to keep the cooked hash browns warm while finishing the rest. -
What kind of oil is best?
Vegetable oil, canola oil, or even clarified butter works well. Each adds a unique flavor! -
Can I make these ahead of time?
Yes! You can partially cook them and store them in the fridge, then finish cooking when you’re ready to serve.
Wrapping Up
Hash browns are a classic comfort food that brings both nostalgia and joy with every crunchy bite. I hope this Quick and Easy Hash Browns Recipe inspires you to embrace the joy of cooking in your own kitchen. So grab those ingredients, stir up some memories, and get ready for a delightful meal that’s bursting with flavor. Happy cooking!