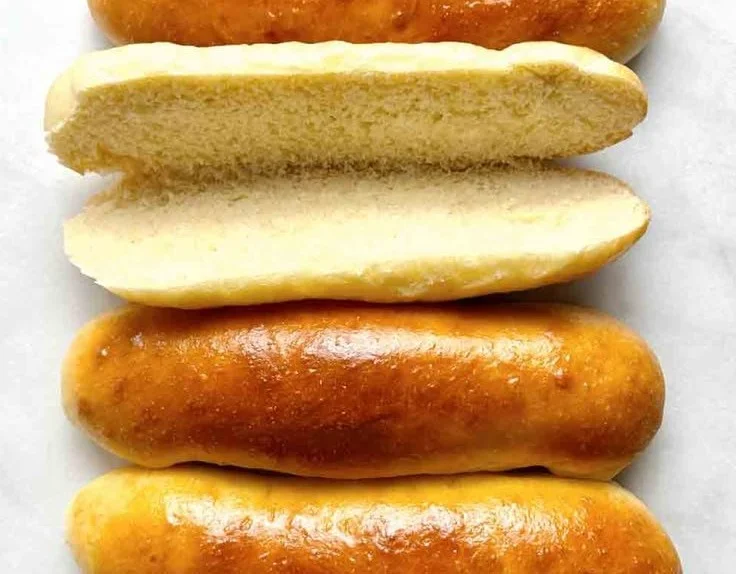
There’s something indescribably magical about the simple act of making bread at home. It’s a process that melds flour, water, yeast, and a sprinkle of love into something truly delightful. I still remember the first time I baked homemade Hot Dog Buns. It was a summer afternoon, the sun streaming through the kitchen window, and the smell of fresh bread wafting through my house. The thrill of holding those warm buns in my hands—the soft pillowy texture, the slight warmth, and the anticipation of biting into them with a juicy hot dog nestled inside—made it an unforgettable experience. Each bite reminded me of summer barbecues and outdoor picnics, where laughter and good food intertwine.
Recipe Timing
- Prep Duration: 20 minutes
- Active Cooking: 15-20 minutes
- Total Duration: 1 hour 50 minutes (including rise time)
- Portion Size: 8 buns
- Complexity: Simple
Nutritional Recipe
- Calories per portion: Approximately 200 calories
- Protein: 4g per serving
- Carbs: 36g per serving
- Fats: 5g per serving
- Fiber: 1g per serving
- Sugars: 2g per serving
- Sodium: 200mg per serving
Why You’ll Love This Homemade Hot Dog Buns
There’s a certain joy that comes from making your food from scratch, and homemade hot dog buns are no exception. These buns are soft, fluffy, and adaptable, perfectly cradling your favorite fillings. Whether you’re hosting a backyard barbecue or simply enjoying a cozy movie night at home, these buns elevate the humble hot dog to gourmet status. Plus, the process of baking can be therapeutic—a chance to disconnect from the hustle and bustle of daily life and create something nourishing and wholesome.
The Complete Cooking Journey
Cooking these homemade hot dog buns is not just about the end product; it’s about the journey. From the moment you combine the ingredients and feel the dough come to life under your hands to the moment they emerge golden brown from the oven, the whole experience brings joy. It’s a reminder that simple ingredients can lead to extraordinary results.
Ingredients:
- 4 cups all-purpose flour
- 1 packet (2 1/4 teaspoons) active dry yeast
- 1/4 cup sugar
- 1 teaspoon salt
- 1 cup warm water
- 1/4 cup milk
- 1/4 cup unsalted butter, melted
- 1 large egg
- Sesame seeds (optional)
Method:
Step 1: Activate the Yeast
In a small bowl, combine warm water, yeast, and sugar. Let it sit for 5-10 minutes until frothy. This step is critical as it awakens the yeast, setting the stage for your dough to rise beautifully.
Step 2: Create the Dry Mixture
In a large bowl, mix flour and salt. This will compose the base of your buns. The salt not only adds flavor but also strengthens the dough’s structure.
Step 3: Combine Ingredients
Add the yeast mixture, milk, melted butter, and egg to the flour. Mix until a dough forms, and watch as it transforms into something greater than the sum of its parts.
Step 4: Knead the Dough
Knead for about 5-10 minutes on a floured surface until smooth. This is where your dough gets its strength and character, developing the gluten that will create the perfect chew.
Step 5: Let the Dough Rise
Place in a greased bowl, cover, and let it rise for 1 hour until doubled in size. Patience is key here—this rising allows the dough to become light and airy.
Step 6: Shape the Buns
Punch down the dough and divide it into 8 equal pieces. Shape each piece into a bun, forming them gently to create a smooth surface.
Step 7: Second Rise
Place buns on a baking sheet lined with parchment paper. Cover and let rise for another 30 minutes. This is your final chance for the dough to puff up and get ready for baking.
Step 8: Preheat the Oven
Preheat the oven to 375°F (190°C). The perfect temperature to achieve golden, fluffy buns.
Step 9: Brush and Sprinkle
Optionally, brush with egg wash and sprinkle sesame seeds. This step not only gives your buns a lovely shine but also adds a hint of crunch.
Step 10: Bake to Perfection
Bake for 15-20 minutes until golden brown. As they bake, the aroma will fill your kitchen, making it almost impossible to resist sneaking a taste.
Step 11: Let Cool
Let cool before using. It’s important to allow them to rest; this way, they’ll retain their lovely texture when you fill them.
Serving Suggestions & Pairings
These homemade hot dog buns aren’t just for hot dogs! They’re perfect for sandwiches, sliders, or even served with soup. Pair them with your favorite toppings—crispy onions, tangy mustard, or spicy relish for a fun twist. Host a hot dog bar where friends can customize their toppings.
Storage & Leftovers Guide
Store any leftover buns in an airtight container at room temperature for up to 2 days, or in the refrigerator for up to a week. You can also freeze them for up to 3 months—just let them thaw at room temperature when you’re ready to use them again.
Kitchen Wisdom & Success Tips
- Make sure your water is warm but not too hot; temperatures over 120°F (49°C) can kill the yeast.
- If the dough seems too sticky, gradually add a little more flour until you reach the desired consistency during kneading.
- Allow the buns to cool completely before wrapping for storage to avoid wet buns.
Flavor Variations & Adaptations
Feel adventurous? Try adding herbs, garlic powder, or grated cheese to the dough for added flavor. You could even experiment with whole wheat flour for a heartier bun—just adjust the liquid slightly.
Reader Questions & Solutions
-
What if my dough doesn’t rise?
If your dough doesn’t rise, check the freshness of your yeast. It might need to be activated longer. Ensure the water you used was warm, not hot. -
Can I make these with whole wheat flour?
Yes! Whole wheat flour can replace all-purpose flour, though it may require a little extra liquid. -
How do I know when the buns are done?
They should be golden brown and sound hollow when tapped on the bottom. Also, an instant-read thermometer should read 190°F (88°C) in the center of the bun. -
Can I add spices to the dough?
Absolutely! Innovations like garlic powder or onion powder mixed in can give your buns a unique twist. -
What’s the best way to freeze these buns?
Ensure they cool completely, then wrap them tightly in plastic wrap followed by a layer of foil to prevent freezer burn.
Wrapping Up
Making homemade hot dog buns might seem like a simple task, but it can create beautiful memories and delicious meals. These buns are more than just a side—each bite brings a sense of home and comfort. So gather your ingredients, roll up your sleeves, and embark on this delightful cooking adventure. Your taste buds (and your loved ones) will thank you! Enjoy crafting these soft, fluffy, golden-brown treasures, and watch as the joy of homemade goodness takes center stage in your kitchen. Happy baking!
PrintHomemade Hot Dog Buns

Soft, fluffy, and delicious homemade hot dog buns perfect for any barbecue or picnic.
- Prep Time: 20 minutes
- Cook Time: 15-20 minutes
- Total Time: 110 minutes
- Yield: 8 servings 1x
- Category: Bread
- Method: Baking
- Cuisine: American
- Diet: Vegetarian
Ingredients
- 4 cups all-purpose flour
- 1 packet (2 1/4 teaspoons) active dry yeast
- 1/4 cup sugar
- 1 teaspoon salt
- 1 cup warm water
- 1/4 cup milk
- 1/4 cup unsalted butter, melted
- 1 large egg
- Sesame seeds (optional)
Instructions
- Activate the yeast: In a small bowl, combine warm water, yeast, and sugar. Let it sit for 5-10 minutes until frothy.
- Create the dry mixture: In a large bowl, mix flour and salt.
- Combine ingredients: Add the yeast mixture, milk, melted butter, and egg to the flour. Mix until a dough forms.
- Knead the dough: Knead for about 5-10 minutes on a floured surface until smooth.
- Let the dough rise: Place in a greased bowl, cover, and let it rise for 1 hour until doubled in size.
- Shape the buns: Punch down the dough and divide it into 8 equal pieces. Shape each piece into a bun.
- Second rise: Place buns on a baking sheet lined with parchment paper. Cover and let rise for another 30 minutes.
- Preheat the oven: Preheat to 375°F (190°C).
- Brush and sprinkle: Optionally, brush with egg wash and sprinkle sesame seeds.
- Bake to perfection: Bake for 15-20 minutes until golden brown.
- Let cool before using.
Notes
These buns are versatile and can be used for sandwiches, sliders, or served with soup. They can be frozen for up to 3 months.
Nutrition
- Serving Size: 1 bun
- Calories: 200
- Sugar: 2g
- Sodium: 200mg
- Fat: 5g
- Saturated Fat: 2g
- Unsaturated Fat: 3g
- Trans Fat: 0g
- Carbohydrates: 36g
- Fiber: 1g
- Protein: 4g
- Cholesterol: 30mg