There’s something truly magical about the humble grilled cheese sandwich, isn’t there? Growing up, this was a staple at my family’s dinner table, the kind of comfort food that brought smiles during even the gloomiest of days. I remember those lazy Saturdays when we’d gather around the kitchen, the scent of melting cheese transforming the space into a cozy haven. It’s these fond memories that inspired my latest culinary creation: Mini Grilled Cheese Hawaiian Rolls. These little bites of joy not only capture the essence of the classic sandwich but also add a tropical twist that’s sure to impress your family and friends.
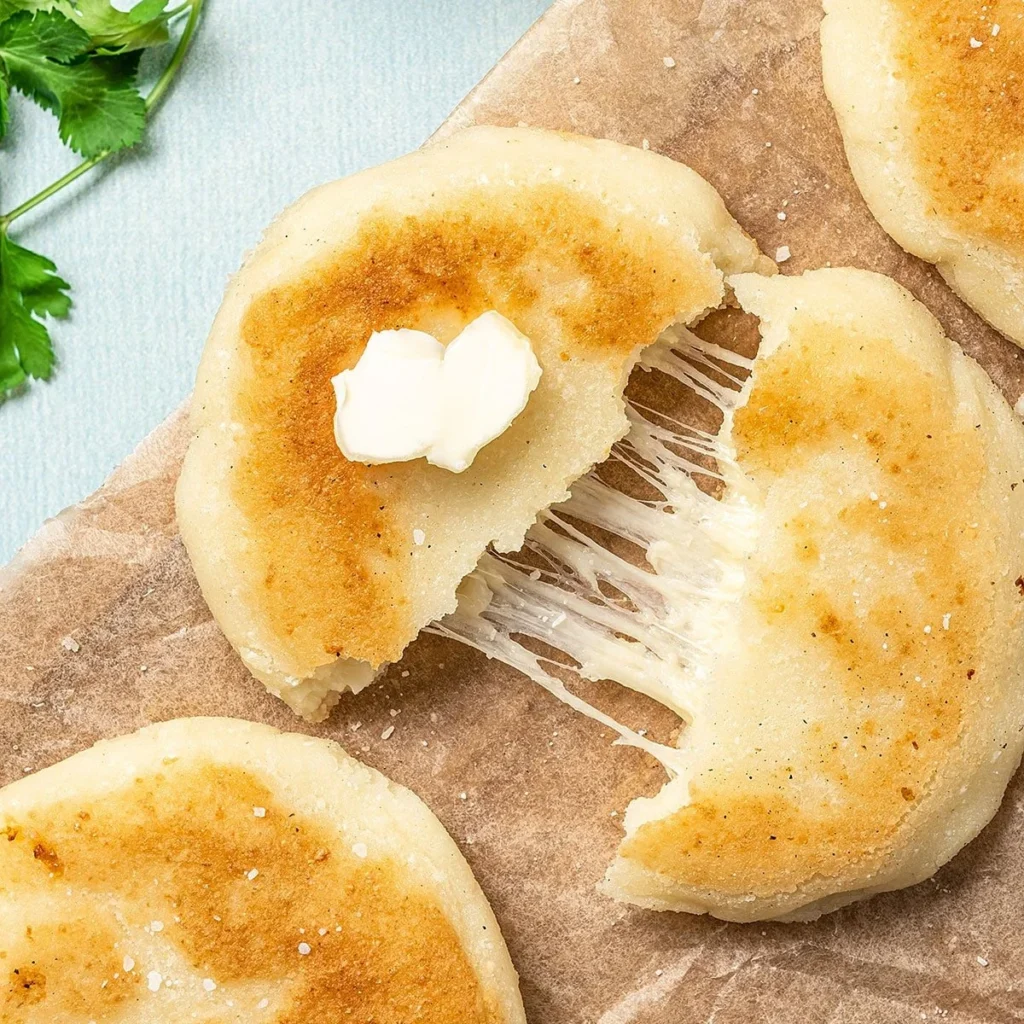
Imagine sinking your teeth into a warm, buttery roll, only to encounter the gooey goodness of cheddar or American cheese oozing out. The Hawaiian rolls infuse a hint of sweetness, making each bite a delightful balance of flavors. Whether you’re hosting a game day gathering or just craving a quick snack after a long day, these mini grilled cheese sandwiches will become your go-to treat!
Recipe Timing
- Prep Duration: 10 minutes
- Active Cooking: 8 minutes
- Total Duration: 18 minutes
- Portion Size: Serves 6 (2 halves per person)
- Complexity: Simple
Nutritional Recipe
- Calories per portion: Approximately 210
- Protein: 8 grams per serving
- Carbs: 23 grams per serving
- Fats: 10 grams per serving
- Fiber: 0 grams per serving
- Sugars: 2 grams per serving
- Sodium: 440 mg per serving
Why You’ll Love This Mini Grilled Cheese Hawaiian Rolls
These mini delights are the perfect blend of convenience and comfort. Not only are they incredibly easy to make, but they also have that nostalgic quality—perfect for adults and kids alike. The sweetness of the Hawaiian rolls pairs beautifully with the savory cheese and buttery goodness, making them a hit at any gathering. Additionally, they’re customizable! Feel free to experiment with different cheeses or add a spicy kick with jalapeños or a sprinkle of red pepper flakes.
The Complete Cooking Journey
Step 1: Preheat Your Cooking Surface
Start by preheating your grill or a skillet over medium heat. This is essential for achieving that golden-brown crust we all love!
Step 2: Slice the Hawaiian Rolls
Gently slice the Hawaiian rolls in half horizontally, keeping them attached at the edges. This will create the perfect pocket for your cheesy goodness.
Step 3: Prepare the Garlic Butter
In a small bowl, mix the softened unsalted butter with the garlic powder, if using. This aromatic garlic butter will add a savory layer of flavor to your sandwiches. Spread it evenly on the outer sides of each roll half.
Step 4: Assemble the Bottom Halves
Lay the bottom halves of the sliced rolls on a clean working surface. It’s time for the star ingredient! Place two slices of cheese on each roll half.
Step 5: Complete the Assembly
Cover each cheesy bottom half with the top halves of the rolls, assembling the sandwiches. Press them down slightly to ensure the goodies stay tucked inside.
Step 6: Grill the Sandwiches
Place the assembled sandwiches on the preheated grill or skillet. Cook for about 3-4 minutes on one side, pressing down gently with a spatula until golden brown and crispy.
Step 7: Flip and Finish
Carefully flip the sandwiches over and cook the other side for an additional 3-4 minutes until that side is also golden brown and the cheese is beautifully melted.
Step 8: Cool and Slice
Remove the sandwiches from the grill or skillet and let them cool for a moment. Then, slice them into individual mini sandwiches for that perfect bite-sized treat.
Step 9: Garnish and Serve
Optionally, sprinkle chopped fresh parsley over the sandwiches for a pop of color and an added touch of flavor.
Ingredients:
- 12 Hawaiian sweet rolls
- 6 tablespoons unsalted butter, softened
- 12 slices American cheese or cheddar cheese
- 1 teaspoon garlic powder (optional)
- 1 teaspoon chopped fresh parsley (optional for garnish)
Serving Suggestions & Pairings
Serve these mini grilled cheese sandwiches alongside a warm bowl of tomato soup for a classic pairing that never gets old. You can also opt for a fresh salad or a side of crispy chips for that satisfying crunch. Perhaps pair your sandwiches with a fruity beverage or iced tea for the ultimate meal experience.
Storage & Leftovers Guide
If you have leftovers (a rare occurrence when serving these), store them in an airtight container in the refrigerator for up to 3 days. To reheat, simply pop them back on the grill or in a skillet for a few minutes until warmed through and the cheese is melty again.
Kitchen Wisdom & Success Tips
- For extra flavor, experiment with different types of cheese such as mozzarella, gouda, or pepper jack.
- If you’re feeling adventurous, add a slice of crispy bacon or a tomato slice in each sandwich before grilling.
- Remember that patience is key! Don’t rush the grilling process; give them time to develop that perfect crispy outer layer.
Flavor Variations & Adaptations
Consider adding a bit of sweetness by layering some thinly sliced peaches or pears inside the sandwich, or toss in some fresh herbs like thyme or basil for a twist. For those who love a bit of heat, how about adding pickled jalapeños for a spicy kick?
Reader Questions & Solutions
- Can I make these ahead of time? Yes! Prepare the sandwiches ahead of time, refrigerate them, and grill when you’re ready to serve.
- What type of cheese works best? You can use any cheese; American and cheddar melt beautifully but feel free to try gouda or even a spicy pepper jack for a twist.
- Can I use regular bread? Absolutely! Just make sure to adjust grilling time based on the type of bread to achieve a similar crispiness.
- What should I serve with these? They pair beautifully with soup, salad, or even a fresh fruit plate!
- How do I prevent the cheese from oozing out? Make sure the roll edges are pressing down tightly on the cheese, and avoid overstuffing them.
Wrapping Up
These Mini Grilled Cheese Hawaiian Rolls are more than just a snack; they’re a joyful reminder of simpler times. They’re easy to whip up and incredibly satisfying, making them perfect for any occasion. So, gather your loved ones, roll up your sleeves, and indulge in this cheesy, buttery delight. Happy cooking!
PrintMini Grilled Cheese Hawaiian Rolls

A delightful twist on the classic grilled cheese sandwich, featuring Hawaiian rolls infused with sweetness and gooey melted cheese.
- Prep Time: 10 minutes
- Cook Time: 8 minutes
- Total Time: 18 minutes
- Yield: 6 servings 1x
- Category: Appetizer
- Method: Grilling
- Cuisine: American
- Diet: Vegetarian
Ingredients
- 12 Hawaiian sweet rolls
- 6 tablespoons unsalted butter, softened
- 12 slices American cheese or cheddar cheese
- 1 teaspoon garlic powder (optional)
- 1 teaspoon chopped fresh parsley (optional for garnish)
Instructions
- Preheat your grill or a skillet over medium heat.
- Slice the Hawaiian rolls in half horizontally, keeping them attached at the edges.
- Prepare the garlic butter by mixing the softened butter with garlic powder (if using).
- Assemble the bottom halves of the sliced rolls on a clean working surface and add two slices of cheese on each roll half.
- Cover each cheesy bottom half with the top halves of the rolls, pressing down slightly.
- Grill the sandwiches on the preheated grill or skillet for 3-4 minutes on one side.
- Flip the sandwiches and cook for an additional 3-4 minutes until golden brown.
- Cool the sandwiches for a moment, then slice them into individual mini sandwiches.
- Garnish with chopped fresh parsley if desired before serving.
Notes
For extra flavor, experiment with different types of cheese. These sandwiches pair well with tomato soup or a fresh salad.
Nutrition
- Serving Size: 2 halves per person
- Calories: 210
- Sugar: 2g
- Sodium: 440mg
- Fat: 10g
- Saturated Fat: 6g
- Unsaturated Fat: 4g
- Trans Fat: 0g
- Carbohydrates: 23g
- Fiber: 0g
- Protein: 8g
- Cholesterol: 20mg