
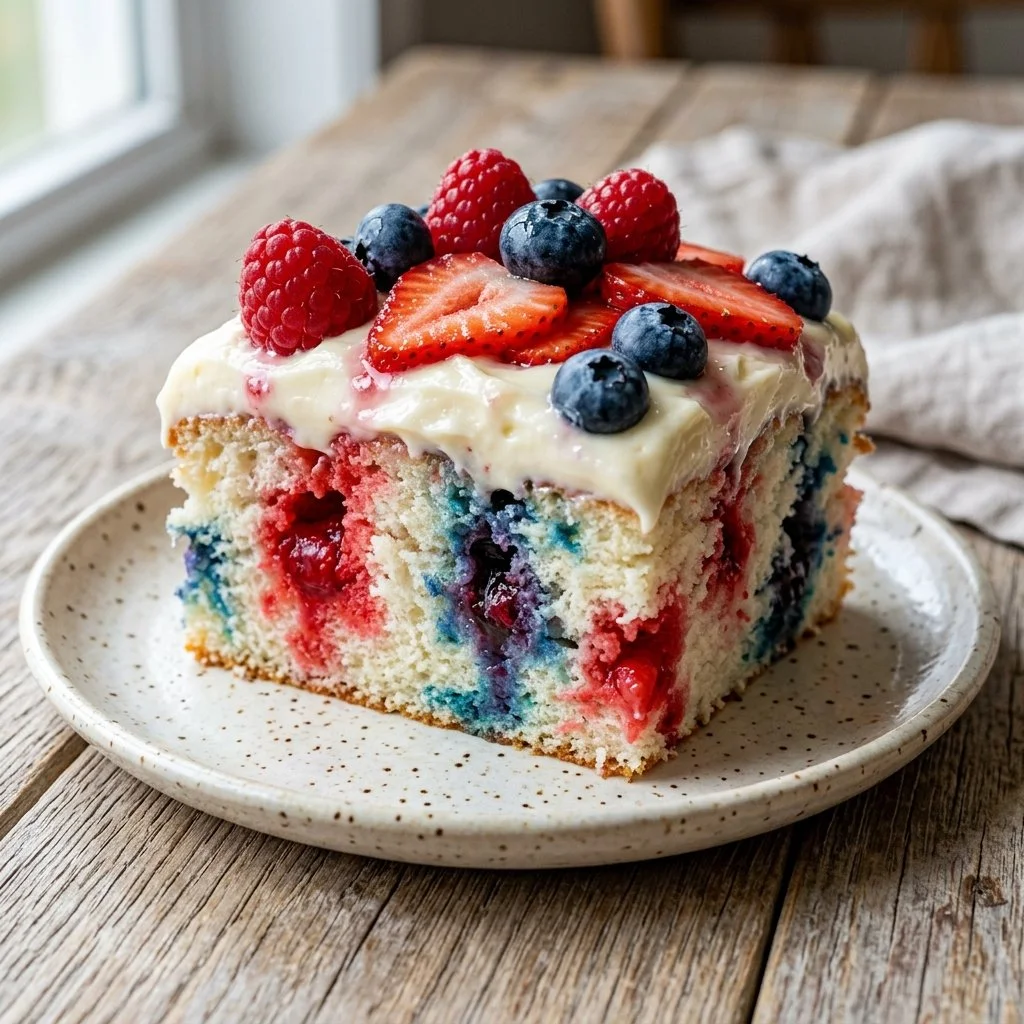
There’s something magical about a celebration when the table is not just a surface but a canvas drenched in colors and sweetness. As I stood in my kitchen, the aroma of baking cake filled the air—a familiar and heartwarming scent that wrapped around me like a cozy blanket. This wasn’t just any cake; it was a Red White and Blue Poke Cake, adorned with vibrant berries that made my heart swell with pride. With each poke in the warm cake, I thought of community gatherings, fireworks lighting up the night sky, and laughter shared among friends and family. It’s the kind of dessert that beckons festive joy, perfect for summer barbecues, Fourth of July celebrations, and any gathering where we come together to celebrate the moments that matter.
Now, let’s dive into the culinary journey of creating this delightful dessert!
Recipe Timing
- Prep Duration: 15 minutes
- Active Cooking: 30 minutes
- Total Duration: 1 hour 15 minutes (including cooling)
- Portion Size: 12 servings
- Complexity: Simple
Nutritional Recipe
- Calories per portion: 250 kcal approximately
- Protein: 5g per serving
- Carbs: 40g per serving
- Fats: 10g per serving
- Fiber: 1g per serving
- Sugars: 25g per serving
- Sodium: 200mg per serving
Why You’ll Love This Red White and Blue Poke Cake
This Red White and Blue Poke Cake is not only visually stunning with its vibrant layers, but it’s also a canvas of flavors. The sweet white cake absorbs a luscious sweetened condensed milk mixture, which keeps it moist and decadent. Topped with whipped cream and fresh berries, this cake is the epitome of summer indulgence. Plus, the simplicity of the recipe makes it accessible for bakers of all skill levels. Whether you’re a seasoned pro or just starting out in the kitchen, you’ll find joy in every step.
The Complete Cooking Journey
Let’s embark on this cake-making adventure together, step by step.
Ingredients:
- 1 box white cake mix
- 3 large eggs
- 1 cup water
- 1 can sweetened condensed milk
- 1 cup blueberries
- 1 cup strawberries, chopped
- 1 cup whipped topping
- Red and blue food coloring (optional)
- Sprinkles (optional)
Method:
Step 1: Preheat & Prepare Baking Pan
Preheat the oven to 350°F (175°C). Grease and flour a 9×13 inch baking pan to ensure your cake releases beautifully once baked.
Step 2: Mix the Cake Batter
In a bowl, prepare the cake mix according to package instructions, adding the eggs and water. Mix until everything is well combined and the batter is smooth.
Step 3: Bake the Cake
Pour the batter into the prepared baking pan and bake for 25-30 minutes or until a toothpick inserted into the center comes out clean. The anticipation is real!
Step 4: Poke Holes
Once baked, remove the cake from the oven and immediately poke holes all over the surface using a fork or skewer. This is where the magic begins, as those holes will allow the sweet milk mixture to seep in.
Step 5: Create the Colorful Milk Mixture
In a separate bowl, mix the sweetened condensed milk with red and blue food coloring if using. This will create a beautiful tie-dye effect when poured over the cake. Then, pour this mixture over the cake, letting it fill the holes you’ve made.
Step 6: Cool Completely
Allow the cake to cool completely. This is a crucial step as it ensures the cake is set and ready for its topping.
Step 7: Top with Whipped Topping
Once cooled, top the cake with whipped topping, spreading it evenly across the surface.
Step 8: Decorate with Berries
Now it’s time for the berries! Decorate the cake with fresh blueberries and chopped strawberries, creating a festive and delicious display.
Step 9: Add Some Fun with Sprinkles
Optional: Add red, white, and blue sprinkles for an extra festive touch. This is where you can let your creativity shine!
Step 10: Slice and Serve
Slice and serve chilled. Watching your guests’ faces light up as they take their first bite is the best part of all!
Serving Suggestions & Pairings
This delightful poke cake shines on its own but can be paired beautifully with a scoop of vanilla ice cream for an added touch of decadence. Serve it alongside a refreshing summer drink, like lemonade or sweet tea, for a festive touch that’ll have everyone in a celebratory mood.
Storage & Leftovers Guide
Store any leftovers in an airtight container in the refrigerator. The cake is best enjoyed within 3-5 days for optimal freshness. If you plan on storing it longer, consider slicing the cake and wrapping individual pieces tightly for easy grab-and-go treats!
Kitchen Wisdom & Success Tips
- Make sure to poke holes while the cake is still warm for the best absorption of the milk.
- If you’re unsure about the food coloring, start with a few drops and adjust until you reach your desired color.
- Use fresh, ripe berries for the best flavor and appearance.
Flavor Variations & Adaptations
Feel free to get creative! Swap out the strawberries and blueberries with other fruits like raspberries or kiwi. You can also experiment with different cake flavors, such as chocolate or lemon, for a unique twist!
Reader Questions & Solutions
-
Can I use a homemade cake mix instead of a box mix?
- Absolutely! Just ensure it’s a comparable white cake recipe.
-
What if I don’t have sweetened condensed milk?
- You can make a homemade version by simmering regular milk with sugar until it thickens.
-
Can this cake be frozen?
- Yes, you can freeze it! Just make sure to wrap it well. Thaw in the refrigerator before serving.
-
What’s the best way to serve this cake?
- Chilled slices make a lovely presentation, alongside fresh fruit or a scoop of ice cream.
-
Can I make it ahead of time?
- Definitely! It can be made a day in advance. Just add the whipped topping and berries the day of serving for freshness.
Wrapping Up
Baking this Red White and Blue Poke Cake is more than just cooking; it’s about creating memories, sharing joy, and celebrating life’s moments, big or small. As you take this recipe and make it your own, remember that it’s the love and care you put into your cooking that turns a simple dish into something extraordinary. Gather your loved ones, slice that cake, and enjoy the celebrations ahead! Happy baking!
PrintRed White and Blue Poke Cake

A vibrant and festive poke cake adorned with fresh berries, perfect for summer celebrations.
- Prep Time: 15 minutes
- Cook Time: 30 minutes
- Total Time: 75 minutes
- Yield: 12 servings 1x
- Category: Dessert
- Method: Baking
- Cuisine: American
- Diet: Vegetarian
Ingredients
- 1 box white cake mix
- 3 large eggs
- 1 cup water
- 1 can sweetened condensed milk
- 1 cup blueberries
- 1 cup strawberries, chopped
- 1 cup whipped topping
- Red and blue food coloring (optional)
- Sprinkles (optional)
Instructions
- Preheat the oven to 350°F (175°C). Grease and flour a 9×13 inch baking pan.
- Mix the cake mix according to package instructions, adding the eggs and water. Mix until smooth.
- Pour the batter into the prepared pan and bake for 25-30 minutes, or until a toothpick comes out clean.
- Remove the cake from the oven and poke holes all over the surface with a fork.
- Mix sweetened condensed milk with food coloring, if using, and pour over the cake.
- Allow the cake to cool completely.
- Top the cake with whipped topping, spreading it evenly.
- Decorate with fresh blueberries and chopped strawberries.
- Add red, white, and blue sprinkles, if desired.
- Slice and serve chilled.
Notes
Store leftovers in an airtight container in the refrigerator for 3-5 days. Consider slicing for grab-and-go treats.
Nutrition
- Serving Size: 1 slice
- Calories: 250
- Sugar: 25g
- Sodium: 200mg
- Fat: 10g
- Saturated Fat: 5g
- Unsaturated Fat: 5g
- Trans Fat: 0g
- Carbohydrates: 40g
- Fiber: 1g
- Protein: 5g
- Cholesterol: 50mg